
Page 56 - Wood Review Dec 202 Full issue
P. 56
TECHNIQUE
5
Ammonia needs to evenly touch every part of the piece, or else you’ll be left with splotches of colour. I wiped it
on wet with one cloth first, then used a dry rag to pull back evenly. One of the benefits of fuming with ammonia (putting the piece in a small tent with liquid ammonia) is the assurance of an even surface.
After a few days I polished the surface with Xanthorrhoea resin dissolved in alcohol using a cotton rubber. A small amount of pumice powder was added to the pad to partially fill the grain.
I held the piece in my hand rather than putting it on the lathe in order to work the resin in a more controlled way, and also to practise my polishing technique.
Practising on an odd shape is an added challenge. I used a larger rubber for the broad surface, but switched to a smaller rubber to reach around the corners and into the mouth, polishing solidly for about ten minutes. I wasn’t aiming for a big built-up finish, so this was easily done in one session. What I had when I finished was a nice brown/amber piece with a hint of reddish glow and a black base.
Accidents may happen
Did you know that Xanthorrhoea resin gets redder with UV light? I knew it was a natural waterproof resin that dissolved in alcohol similar to shellac. I had never worked with it before, but knew it had a reddish hue like dragon’s blood (another resin). The polished maple vase sat in
my living room, and after a few days the half facing the morning light was a much deeper red than the other half. I rotated the vase 180° and two days later the two sides were equally red.
This is the absolute dread of every woodworker. You don’t want to put something on your piece, a piece you potentially spent hundreds of hours on, and find out it changes colour,
or breaks down, or otherwise does something unexpected. Dovetails are easy in this regard: if they fit, they fit. Your process improving is very visual and immediate. Other aspects of a
56
Australian Wood Review
5. To complete the smallest vase a small red glass
‘dribble’ was made to resemble the response of bloodwood gum after bushfire damage.
6. Detail of the scorched and
primed cracks highlighted with gold leaf.
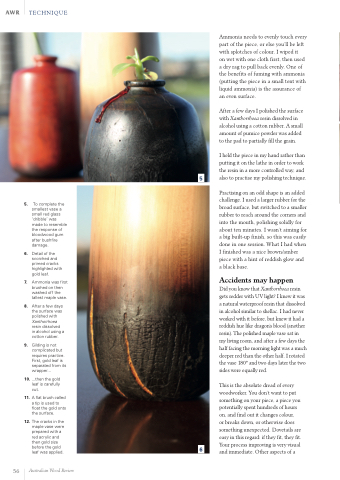
7. Ammonia was first brushed on then washed off the tallest maple vase.
8. After a few days the surface was
polished with
Xanthorrhoea
resin dissolved in alcohol using a cotton rubber.
9. Gilding is not complicated but requires practice. First, gold leaf is separated from its wrapper...
10. ...then the gold leaf is carefully
cut.
11. A flat brush called a tip is used to
float the gold onto the surface.
12. The cracks in the
maple vase were
prepared with a
red acrylic and
then gold size
before the gold 6 leaf was applied.
