
Page 18 - ALG Issue 2 2025
P. 18
RECIPES
Now that you’ve sown your
chilli seeds, sit back and
wait for your fiery harvest.
With patience and care,
you’ll soon have homegrown
chillies to spice up your
cooking – perfect for this
delicious recipe!
After growing chillies of various types over
the years, I decided to try some ‘Dorset
Naga’ – a ‘superhot’ registering up to 1.5
million Scoville Heat Units on the Scoville
scale. The jalapenos on your pizza clock in
at about 5,000, so it was clear these were
going to be hot stuff. I knew I was going
to have to do something different with
them after absentmindedly taking a bite
whilst sitting on the allotment on a sunny
afternoon in July. It was so hot it felt like
my scalp was peeling off. I thought I was
going to have to call for help.
After pulling myself together, and helped
along by a bit of googling, I decided a
fermented hot sauce was the answer. The
theory is, apparently, that fermentation
takes the edge off the stinging heat, leaving
a more rounded, deeper flavour. I’ve been
really pleased with the result.
The heat mellows slightly but still packs a
punch. I built a smoky base with caramelised
shallots and added tinned mango for
sweetness and body. Fermenting is easy,
relying on natural yeast from the fruit. Just
be mindful of the brine – too salty, and
good bacteria won’t thrive; too weak, and
bad bacteria take over. No special skills
or equipment needed – just a Kilner jar, a
weight, and a couple of weeks of occasional
checking.
I add this sauce wherever I need zing
– on rice, stir-fries, or chilli-con-carne. A
favourite? Mixing it with butter and honey
for crispy air-fried chicken thighs. Naga
Buffalo chicken, anyone?
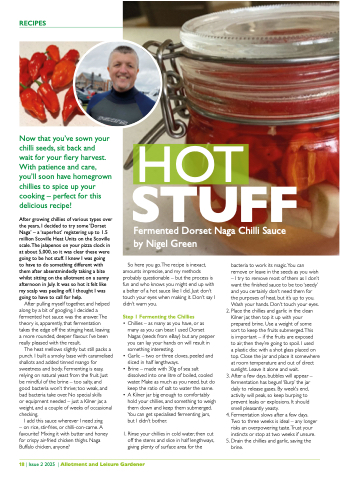
HOT
STUFF
Fermented Dorset Naga Chilli Sauce
by Nigel Green
So here you go. The recipe is inexact,
amounts imprecise, and my methods
probably questionable – but the process is
fun and who knows you might end up with
a belter of a hot sauce like I did. Just don’t
touch your eyes when making it. Don’t say I
didn’t warn you.
Step 1 Fermenting the Chillies
•
Chillies – as many as you have, or as
many as you can bear. I used Dorset
Nagas (seeds from eBay) but any pepper
you can lay your hands on will result in
something interesting.
•
Garlic – two or three cloves, peeled and
sliced in half lengthways.
•
Brine – made with 30g of sea salt
dissolved into one litre of boiled, cooled
water. Make as much as you need, but do
keep the ratio of salt to water the same.
•
A Kilner jar big enough to comfortably
hold your chillies, and something to weigh
them down and keep them submerged.
You can get specialised fermenting jars,
but I didn’t bother.
1. Rinse your chillies in cold water, then cut
off the stems and slice in half lengthways,
giving plenty of surface area for the
bacteria to work its magic. You can
remove or leave in the seeds as you wish
– I try to remove most of them as I don’t
want the finished sauce to be too ‘seedy’
and you certainly don’t need them for
the purposes of heat, but it’s up to you.
Wash your hands. Don’t touch your eyes.
2. Place the chillies and garlic in the clean
Kilner jar, then top it up with your
prepared brine. Use a weight of some
sort to keep the fruits submerged. This
is important – if the fruits are exposed
to air, then they’re going to spoil. I used
a plastic disc with a shot glass placed on
top. Close the jar and place it somewhere
at room temperature and out of direct
sunlight. Leave it alone and wait.
3. After a few days, bubbles will appear –
fermentation has begun! ‘Burp’ the jar
daily to release gases. By week's end,
activity will peak, so keep burping to
prevent leaks or explosions. It should
smell pleasantly yeasty.
4. Fermentation slows after a few days.
Two to three weeks is ideal – any longer
risks an overpowering taste. Trust your
instincts or stop at two weeks if unsure.
5. Drain the chillies and garlic, saving the
brine.
18 | Issue 2 2025 | Allotment and Leisure Gardener