
Page 105 - The Decorative Painter Summer 2014
P. 105
background. Watch the positive leaf shapes emerge. Al- low the back to dry completely.
STAGE THREE
As we continue to work on the flowers and leaves, it is important to remember that when painting the petals, the white on the irises and elsewhere is the watercolor paper itself—void of paint. To create the shape of the petals, we will be painting darker values inside and around the folds of the petals. This is another exercise in negative painting. PuRPLE IRIS: Begin by creating depth on the iris petals. Mix a medium-value wash of Cobalt Violet. Dampen the folds of the descending petals (called falls) with clear wa- ter. Apply the color wash. Rinse the brush. Now use the brush as a blending tool to push the deeper color to form the folded areas.
On the top petals (called standards), apply a medium- value wash of Winsor Violet+tch French Ultramarine. This is a blue-violet color. On the right side fall-petal, apply blue violet color to the dampened petal creating a deeper, wider cool petal.
For the accent color, apply a touch of Permanent Rose to some dampened areas. Refer to the final project on page 98 or the detail diagram on page 104.
PuRPLE BuDS: Beginning with the upper bud, make a medium value wash of Winsor Violet with clear water. Dampen the outside areas with clear water. Apply the col- or, moving the brush in a rounded outside motion to form the oval shape.
Working with the lower buds, apply a pale wash of Co- balt Violet to the purple areas, pulling up on the ragged edges with the brush tip. Repeat this step immediately with a medium-value wash of Winsor Violet.
GOLDEN IRISES: Mix a medium-value wash of Quinac- ridone Gold+tch Permanent Rose. Dampen the area un- der the center standard petal with clear water. Refer to the detail diagram on page 104 for placement. Apply the color wash to the standard petals and other areas as seen in the diagram. Make sure to dampen each area before applying the wash.
Mix a light value of Transparent Yellow+Cobalt Blue, and apply to the areas shown on the diagram on page 104. Then add a light-value wash of Permanent Rose accent over some or all of the pale green areas. This can be ap- plied over the still-damp green color.
GREEN/REDDISH LEAvES: By now, all the leaf areas have been defined by the negative background painting or the positive shapes painted in Stage One. To create the reddish leaves, add a medium-value wash of Permanent Rose+Quinacridone Gold to a dampened leaf area. Refer to the diagram on page 104 for placement. OvERPAINTING ON LEAvES: This step is optional. Mix a cool green leaf wash and a warm green leaf wash. Apply a juicy, wet swiggle here and there on the background leaf area. Refer to the photo of the finished-art on page 98. Stay loose with the brush. This will help to create layers of foliage.
At this time, you may choose to add any purple or red washes to the stem edge or a leaf area to accent your work. Allow to dry.
STAGE FOUR
This is also an optional step—to cast shadows within the work. There are only a few cast shadows in this project, but they have a significant impact. To begin, reapply the dashed lines of the pattern. We will be working on a bone-dry sur- face. Cast shadow washes are applied in one continuous, fluid motion. Do not back up or blend with your bush.
Mix a dark-value wash of Indigo+Quinacridone Gold. Fill in the dash line (cast shadow) area with a uniform ap- plication of paint. Always move away from the starting point. This technique will create realistic cast shadows. If desired, dampen the upper background leaves and pull a medium-value wash of French Ultramarine along the up- per edge of the leaves. This will make the leaves recede into the background.
FINISHING
When the painting is completely dry, erase all pencil or transfer lines with a clean eraser. I hope this was a learning adventure into negative space and watercolor for you.
watercolor
artist’s sketch
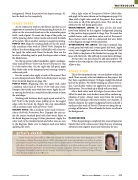
Dolores Lennon mda joined SDP in 1984 and received her Certified Decorative Artist designation in 1985. She became a Master Decorative Artist in 1988, after passing the three required entries. An author of a dozen painting books and numerous published articles, Dolores’ greatest pleasure still stems from sharing what she does with others. Her work in oils and watercolors has been exhibited in juried fine art shows over the years, and is in private and public collections in the United States, Canada, and Japan. She has served as a judge and on the Design and Standards Committee for the Society’s Certification Program. Dolores is presently living in Phoenix, Ariz. You may reach her at artcat@cox.net.
dEcOratIvEpaINtErS.Org
The Decorative Painter • ISSUE NO. 2, 2014 103
