
Page 38 - The Decorative Painter Winter 2016
P. 38
COLORED PENCIL
STEP 5: Brighten the iris with Cream. Use very small cir- cular strokes to lightly outline the iris with Green Ochre. Add a few lines of Green Ochre to the iris from the pupil out and from the outer edge of the iris inward. The high- lights are added with White. Use the Neocolor II Water Soluble Crayon White to put in the brightest highlights. STEP 6: Basecoat around the eye with Warm Grey 90%. Repeat with Black. Add the highlights with White.
NOSE
STEP 1: Very lightly use small circular strokes and basecoat the nose in White. Apply Pink Rose to the nose with medium pressure. Blend with the Colorless Blender. STEP 2: Add a layer of Peach to the nose.
STEP 3: Apply Warm Grey 90% to the darkest areas of the nose.
STEP 4: Deepen the dark areas with Black. Blend the entire nose with the Colorless Blender. The highlights are added with White.
EARS
STEP 1: Basecoat the inside of the ears lightly with Cool Grey 10%.
STEP 2: Shade the dark areas with Warm Grey 90%. Add Ginger Root and Peach in some areas. Blend with the Col- orless Blender.
STEP 3: Deepen some areas lightly with Black. Use Gol- denrod to add fur to the inside edge of the ears. Deepen with Mineral Orange. Make sure the tip is very sharp and add fine lines of fur using Cool Grey 10%, Yellow Ochre, Goldenrod, and Mineral Orange.
STEP 4: Use Cool Grey 10% for the fur on the outside edge of each ear. Brighten with a bit of White.
NOTE: Be sure to pay attention to the direction of the fur. Also pay attention to the length of the fur in different areas. These are important things to keep in mind to end up with a realistic-looking Leopard.
GOLD FUR
STEP 1: Use Cool Grey 10% and linear strokes to basecoat the brightest areas of the gold fur.
STEP 2: Lightly basecoat the entire area of gold fur with Yellow Ochre.
STEP 3: Keep referring to the photo as you add more colors and shading. Using linear strokes, add colors in the following order to create the desired shade: Goldenrod, Mineral Orange, Sienna Brown, and Dark Brown.
STEP 4: You may add Cool Grey 10% using light pres- sure to the brightest areas. The darkest areas of shading are done with Warm Grey 90%.
WHITE FUR
Basecoat all of the areas of white fur using light pressure and linear stokes of Cool Grey 10%. Use the very sharp tip of the White pencil to add the fur strokes. Again, pay close attention to the length of the fur as well as the direction.
BLACK SPOTS
Basecoat using medium pressure and linear strokes of Warm Grey 90%. Repeat using Black.
FINISHING
Spray with multiple coats of Krylon Workable Spray Fixative. Spray from side to side and top to bottom.
artist’s sketch
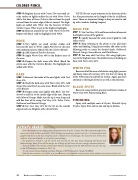
Donna Roskamp has been helping others pursue their love of art for 12 years. She offers classes throughout her community to both children and adults. While Donna loves teaching in acrylics and oils, it is colored pencil and graphite that she loves the most. Graphite pencil is where her love of art began. She shares her love of these two mediums as she travel-teaches at conventions and seminars.
Her passion for animals in real life carries over into her art. She also enjoys designing with flowers and feminine things. Many of her still life designs are of things you will see in her own vintage, romantic-style home.
A proud member of the Society of Decorative Painters, Donna promotes the SDP whenever she can. She was on the SDP Education Committee in 2015-16.
You can contact Donna Roskamp at Artistic Attitudes, 4398 Pinckney Rd., Howell, MI 48843.
Website: Artistic-Attitudes.com, Email: justA_vessel@yAhoo.com, Facebook: donnA roskAmp, artist, website: www.Artistic-Attitudes.com.
36 The Decorative Painter • ISSUE NO. 4, 2016
DECORATIVEPAINTERS.ORG
