
Page 18 - July 2020 Barbecue News Magazine
P. 18
On charcoal or gas cookers, start with 4 to 8 ounces by weight of hardwood, fruitwood, or nutwood for a mild smoke flavor that complements the meat and seasoning without overwhelming. You don't have to be precise, just measure it
in some fashion so you have a baseline for your next cook. Then you can add or sub- tract if you wish.
7) Spritz and mop
Spritzing and mopping ribs periodically with
beer, apple juice, water, or another liquid is
a common practice. They replace a bit of
lost moisture, cool the meat, slow the cook
time, and help the smoke stick. Longer cook
times usually mean more tender meat. You
are also losing a little heat every time you
open your smoker or grill which also adds to
the overall cooking time, but not by much.
And while it is true that wet surfaces hold smoke better than dry, spritzing too much can wash off rub and smoke particles. Spritz- ing can also soften bark. Finally, if you are expecting the liquid to somehow add depth to the final product, the flavor molecules in apple juice and other liquids are so few and far between (mea- sured in parts per million) that they have no impact on taste. Click here to read more about basting. https://amazingribs.com/more-technique-and-science/more- cooking-science/mythbusting-basting-mopping-and-spritzing
8) The Texas crutch and 3-2-1
The Texas crutch is a clever technique that all competition cooks use because it speeds cooking, retains a bit of moisture, and im- proves tenderness. The crutch involves wrapping the slab of ribs in foil or pink butcher paper shortly after the meat has a nice dark color. Competition cooks often add brown sugar, more rub, honey, agave syrup, apple juice, butter, or margarine, to the packet in an effort to boost flavor.
If you wrap tight, moisture loss from evaporation stops and this speeds cooking because evaporation cools the meat. Some liquid comes out of the meat to mingle with the added liquids and the meat slightly braises and tenderizes.
There is a tradeoff in wrapping. It hampers bark formation. Years ago someone came up with a technique called 3-2-1. It prescribes smoke-roasting the meat for 3 hours, then wrapping it and put- ting it back in the cooker for 2 hours, then taking it out of the wrap and smoking it for 1 hour more. We are not fans.
Wrapping ribs for 2 hours is a recipe for overcooked mushy meat. At most you should wrap the rack of ribs for one hour. Try this: 3- 1-1 for babybacks and 4-1-1 for spares and St. Louis cut. Then ex- periment to find your favorite formula.
We usually don’t bother with the crutch at home but in competi- tion, with thousands in prize money, you need every edge you can get, so crutching is essential. If you've seen it on TV and must try it, click here to learn more about the science behind the Texas crutch and how to do it properly. https://amazingribs.com/more- technique-and-science/more-cooking-science/texas-crutch- wrap-foil-tenderize-and-speed-cooking
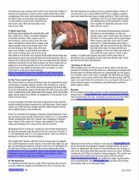
9) The bend test
It is hard to tell when ribs are ready. That's because ribs come in so many different weights and thicknesses. Not to mention the
fact that keeping an outdoor oven at a precise temp is tricky. If you take them up to about 200 to 203°F, the collagens and fats melt and make the meat more tender and juicy. That’s well past
well-done (155°F). It is really hard to read the temperature of ribs precisely so there are a number of tricks the pros use to tell when ribs are ready.
Start by checking the temperature between the bones in several places. As they ap- proach ready, twist a bone near the center of the slab: if it turns easily, that’s a good sign. Some experts stick the meat with a tooth- pick and if it slides through easily, that’s a good sign. We lean on the bend test. Pick up the slab with a pair of tongs and bounce them slightly. If they are ready, the slab will bow until the meat starts to crack on the
surface. A small crack means you need a little more time. It should be close to breaking in half when you lift the slab. You'll get the feel for this with practice.
10) Sauce at the end
When adding sauce to ribs, be sure to do so only in the last few minutes of cooking, after the bend test, allowing just enough time for the sauce to become tacky but not long enough for the sugars in it to burn. One or two coats is enough. We often fire up the gas grill, paint on the sauce, and hit the slab with direct heat, grill lid open, and stand there for a minute or two, waiting for the sauce to sizzle and the sugars to caramelize, flip and repeat, and then we’re ready to serve.
Recipes
If it's a recipe you're after, we have a slew of mouthwatering rib recipes here on AmazingRibs.com https://amazingribs.com/july- 4th-national-bbq-ribs-day including our famous Last Meal Ribs recipe https://amazingribs.com/best-barbecue-ribs-recipe.
Meathead is the barbecue whisperer who founded AmazingRibs.com, by far the world's most popular outdoor cooking website. He is the author of "Meathead, The Science of Great Barbecue and Grilling," a New York Times Best Seller that was also named one of the "100 Best Cookbooks of All Time" by Southern Living magazine. This article was excerpted and modified from his book. More on his book here: https://amazingribs.com/book. For 3,000+ free pages of great barbe- cue and grilling info, visit AmazingRibs.com and take a free 30 day trial membership in the Pitmaster Club.
BarbecueNews.com - 18
JULY 2020
