
Page 28 - Wood Review Dec 202 Full issue
P. 28
3
4
5
67
8
PROJECT
the panels, so I had to plane in two directions and carefully in the middle to avoid tear-out.
Cutting dovetails
The carcase was joined with through dovetails. I marked the tails and sawed to the line. I like to use a marking knife instead of a pencil to mark the tails
as well, because if I don’t saw them completely square I can easily adjust them to the marking knife left. I pare the shoulders with chisels and then transfer the tails to mark the pins. I saw a bit inside the lines and then pare to the lines to get crisp joints with no gaps before a test fit (photo 3).
With the four carcase pieces done I have the real internal measurements for the shelves. After preparing the shelf material I used a router plane to cut dados (photo 4) and rebates, because the piece is not too wide and they are much faster to cut than sliding dovetails. Photo 5 shows the first carcase dry fit.
Side drawer guide
Normally when I make side drawers all the inside guides, runners and kickers are hidden inside the carcase. In this case I had to make a small half case to hide those pieces, otherwise they would be visible from the outside.
A ‘hole’ was first made for the drawer as if for a wide through mortise, but in this case the four inner sides were made completely smooth (photo 6).
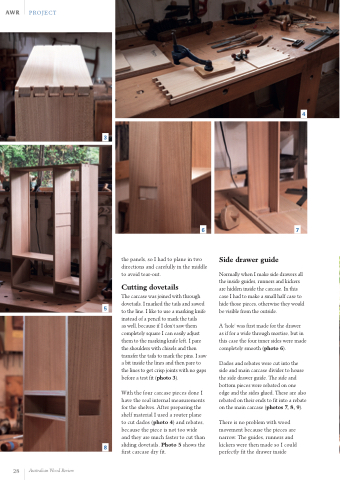
Dados and rebates were cut into the side and main carcase divider to house the side drawer guide. The side and bottom pieces were rebated on one edge and the sides glued. These are also rebated on their ends to fit into a rebate on the main carcase (photos 7, 8, 9).
There is no problem with wood movement because the pieces are narrow. The guides, runners and kickers were then made so I could perfectly fit the drawer inside
28 Australian Wood Review
