
Page 30 - Wood Review Dec 202 Full issue
P. 30
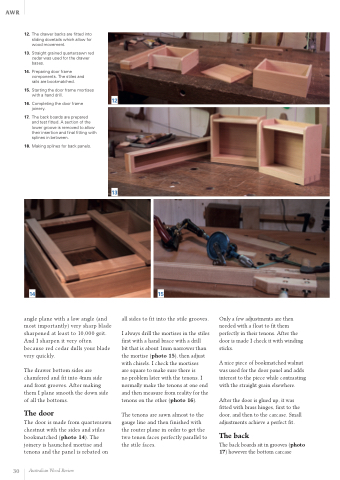
                  12. The drawer backs are fitted into sliding dovetails which allow for wood movement.
13. Straight grained quartersawn red cedar was used for the drawer bases.
14. Preparing door frame components. The stiles and rails are bookmatched.
15. Starting the door frame mortises with a hand drill.
16. Completing the door frame joinery.
12
     13
17. The back boards are prepared
and test fitted. A section of the lower groove is removed to allow their insertion and final fitting with splines in between.
18. Making splines for back panels.
    30
Australian Wood Review
14
15
all sides to fit into the stile grooves.
I always drill the mortises in the stiles first with a hand brace with a drill
bit that is about 1mm narrower than the mortise (photo 15), then adjust with chisels. I check the mortises
are square to make sure there is
no problem later with the tenons. I normally make the tenons at one end and then measure from reality for the tenons on the other (photo 16).
The tenons are sawn almost to the gauge line and then finished with the router plane in order to get the two tenon faces perfectly parallel to the stile faces.
angle plane with a low angle (and most importantly) very sharp blade sharpened at least to 10,000 grit. And I sharpen it very often because red cedar dulls your blade very quickly.
The drawer bottom sides are chamfered and fit into 4mm side and front grooves. After making them I plane smooth the down side of all the bottoms.
The door
The door is made from quartersawn chestnut with the sides and stiles bookmatched (photo 14). The joinery is haunched mortise and tenons and the panel is rebated on
Only a few adjustments are then needed with a float to fit them perfectly in their tenons. After the door is made I check it with winding sticks.
A nice piece of bookmatched walnut was used for the door panel and adds interest to the piece while contrasting with the straight grain elsewhere.
After the door is glued up, it was fitted with brass hinges, first to the door, and then to the carcase. Small adjustments achieve a perfect fit.
The back
The back boards sit in grooves (photo 17) however the bottom carcase
