
Page 67 - Wood Review Dec 202 Full issue
P. 67
89
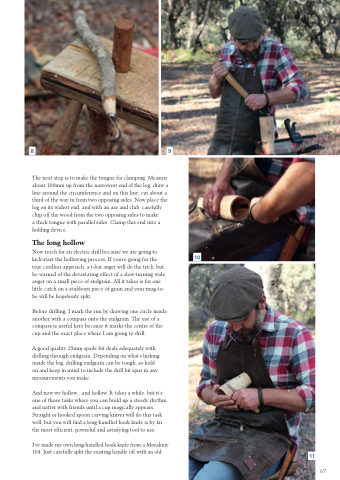
The next step is to make the tongue for clamping. Measure about 100mm up from the narrowest end of the log, draw a line around the circumference and on this line, cut about a third of the way in from two opposing sides. Now place the log on its widest end, and with an axe and club, carefully chip off the wood from the two opposing sides to make
a thick tongue with parallel sides. Clamp this end into a holding device.
The long hollow
Now reach for an electric drill because we are going to kick-start the hollowing process. If you’re going for the true cordless approach, a t-bar auger will do the trick, but be warned of the devastating effect of a slow-turning wide auger on a small piece of endgrain. All it takes is for one little catch on a stubborn piece of grain and your mug-to- be will be hopelessly split.
Before drilling, I mark the rim by drawing one circle inside another with a compass onto the endgrain. The use of a compass is useful here because it marks the centre of the cup and the exact place where I am going to drill.
A good quality 25mm spade bit deals adequately with drilling through endgrain. Depending on what’s lurking inside the log, drilling endgrain can be tough, so hold on and keep in mind to include the drill bit spur in any measurements you make.
And now we hollow...and hollow. It takes a while, but it’s one of those tasks where you can build up a steady rhythm and natter with friends until a cup magically appears. Straight or hooked spoon carving knives will do this task well, but you will find a long-handled hook knife is by far the most efficient, powerful and satisfying tool to use.
I’ve made my own long-handled hook knife from a Morakniv 164. Just carefully split the existing handle off with an old
10
11
67
