
Page 69 - Wood Review Dec 202 Full issue
P. 69
WOODCARVING
16
12. Carving a lip.
13. Make the bottom parallel to the top by holding
a pencil at the
same height and rotating the mug.
14. Sawing the bottom of the
mug to ensure it sits just right.
15. Make the bottom wide enough to be stable.
16. Use the knife tip to bevel the lip
and bottom with a lever cut.
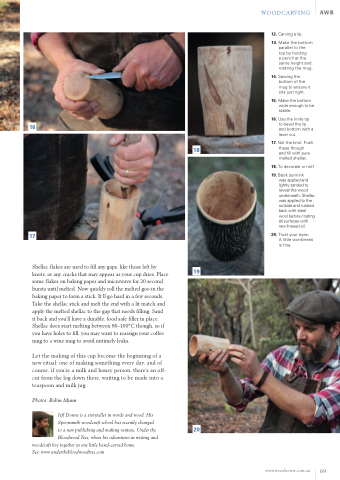
17. Not the knot. Push these though
and fill with pure melted shellac.
18. To decorate or not?
19. Black sumi ink was applied and lightly sanded to reveal the wood
underneath. Shellac was applied to the outside and rubbed back with steel wool before coating all surfaces with raw linseed oil.
20. Trust your eyes. A little wonkiness is fine.
18
17
Shellac flakes are used to fill any gaps, like those left by knots, or any cracks that may appear as your cup dries. Place some flakes on baking paper and microwave for 20 second bursts until melted. Now quickly roll the melted goo in the baking paper to form a stick. It’ll go hard in a few seconds. Take the shellac stick and melt the end with a lit match and apply the melted shellac to the gap that needs filling. Sand
it back and you’ll have a durable, food safe filler in place. Shellac does start melting between 80–100°C though, so if you have holes to fill, you may want to reassign your coffee mug to a wine mug to avoid untimely leaks.
Let the making of this cup become the beginning of a new ritual: one of making something every day, and of course, if you’re a milk and honey person, there’s an off- cut from the log down there, waiting to be made into a teaspoon and milk jug.
Photos: Robin Munn
19
Jeff Donne is a storyteller in words and wood. His
Spoonsmith woodcraft school has recently changed
to a new publishing and making venture, Under the 20 Bloodwood Tree, where his adventures in writing and
woodcraft live together in one little hand-carved home. See: www.underthebloodwoodtree.com
www.woodreview.com.au 69
