
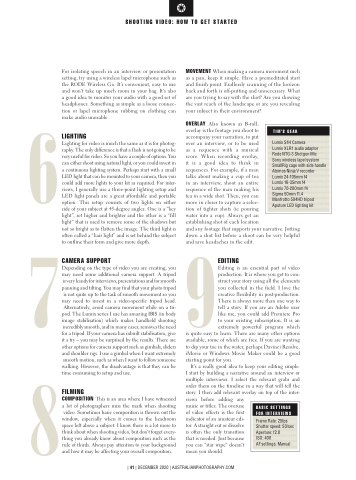
Page 41 - Australian Photography Dec 2020
P. 41
                 For isolating speech in an interview or presentation setting, try using a wireless lapel microphone such as the RODE Wireless Go. It’s convenient, easy to use and won’t take up much room in your bag. It’s also a good idea to monitor your audio with a good set of headphones. Something as simple as a loose connec-
6tion or lapel microphone rubbing on clothing can make audio unusable.
MOVEMENT When making a camera movement such as a pan, keep it simple. Have a premeditated start and finish point. Endlessly scanning of the horizon back and forth is off-putting and unnecessary. What are you trying to say with the shot? Are you showing the vast reach of the landscape or are you revealing your subject in their environment?
OVERLAY Also known as B-roll,
overlay is the footage you shoot to
accompany your narration, to put
over an interview, or to be used
as a sequence with a musical
score. When recording overlay,
it is a good idea to think in
sequences. For example, if a man
talks about making a cup of tea
in an interview, shoot an entire
sequence of the man making his
tea in a wide shot. Then, you can
move in closer to capture a selec-
tion of tighter shots (ie pouring
water into a cup). Always get an
establishing shot of each location
and any footage that supports your narrative. Jotting down a shot list before a shoot can be very helpful
SHOOTING VIDEO: HOW TO GET STARTED
  TIM’S GEAR
Lumix S1H Camera
Lumix XLR1 audio adaptor Rode NTG-3 Shotgun Mic Sony wireless lapel system SmallRig cage with side handle Atomos Ninja V recorder Lumix 24-105mm f4
Lumix 16-35mm f4
Lumix 70-200mm f4
Sigma 50mm f1.4
Manfrotto 504HD tripod Aputure LED lighting kit
LIGHTING
Lighting for video is much the same as it is for photog-
raphy. The only difference is that a flash is not going to be
very useful for video. So you have a couple of options. You
can either shoot using natural light, or you could invest in
a continuous lighting system. Perhaps start with a small
LED light that can be mounted to your camera, then you
could add more lights to your kit as required. For inter-
views, I generally use a three-point lighting setup and
LED light panels are a great affordable and portable
option. This setup consists of two lights on either
side of your subject at 45-degree angles. One is a “key
light”, set higher and brighter and the other is a “fill
light” that is used to remove some of the shadows but
not so bright as to flatten the image. The third light is
often called a “hair light” and is set behind the subject
to outline their form and give more depth. and save headaches in the edit.
79
CAMERA SUPPORT EDITING
Depending on the type of video you are creating, you Editing is an essential part of video
may need some additional camera support. A tripod production. It is where you get to con-
is very handy for interviews, presentations and for smooth struct your story using all the elements
panningandtilting.Youmayfindthatyourphototripod you collected in the field. I love the
is not quite up to the task of smooth movement so you creative flexibility in post-production.
may need to invest in a video-specific tripod head. There is always more than one way to
Alternatively, avoid camera movement while on a tri- tell a story. If you are an Adobe user
pod. The Lumix series I use has amazing IBIS (in body like me, you could add Premiere Pro
image stabilisation) which makes handheld shooting to your existing subscription. It is an
incredibly smooth, and in many cases, removes the need extremely powerful program which for a tripod. If your camera has inbuilt stabilisation, give is quite easy to learn. There are many other options it a try – you may be surprised by the results. There are available, some of which are free. If you are wanting
other options for camera support such as gimbals, sliders and shoulder rigs. I use a gimbal when I want extremely smooth motion, such as when I want to follow someone
to dip your toe in the water, perhaps Davinci Resolve, iMovie or Windows Movie Maker could be a good starting point for you.
8walking. However, the disadvantage is that they can be It’s a really good idea to keep your editing simple.
time consuming to setup and use.
FILMING
COMPOSITION This is an area where I have witnessed a lot of photographers miss the mark when shooting
video. Sometimes basic composition is thrown out the window, especially when it comes to the headroom space left above a subject. I know there is a lot more to think about when shooting video, but don’t forget every- thing you already know about composition such as the rule of thirds. Always pay attention to your background and how it may be affecting your overall composition.
I start by building a narrative around an interview or multiple interviews. I select the relevant grabs and order them on the timeline in a way that will tell the story. I then add relevant overlay on top of the inter- views before adding any
music or titles. The overuse of video effects is the first indicator of an amateur edi- tor. A straight cut or dissolve is often the only transition that is needed. Just because you can “star wipe” doesn’t mean you should.
  BASIC SETTINGS FOR INTERVIEWS
Frame Rate: 25fps Shutter speed: 50/sec Aperture: f2.8
ISO: 400
AF settings: Manual
| 41 | DECEMBER 2020 | AUSTRALIANPHOTOGRAPHY.COM
