
Page 52 - s
P. 52
R ecording to a file (“Record File”)
“Record File” provides recording a mix
session to a .WAV or .MP3 file direct to
the system’s hard drive. When the
recording is completed, it can then be
listened to in VirtualDJ, edited with an
audio editing application, or written to a
CD using a CD burning software.
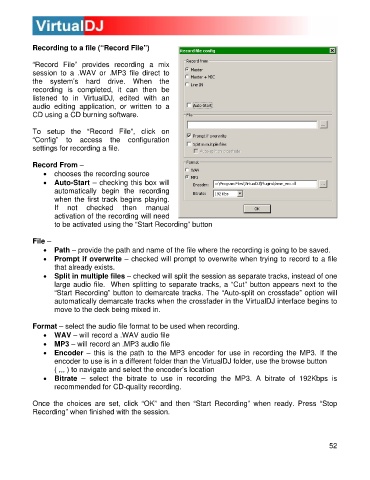
To setup the “Record File”, click on
“Config” to access the configuration
settings for recording a file.
Record From –
• chooses the recording source
• Auto-Start – checking this box will
automatically begin the recording
when the first track begins pla ying.
If not checked then manual
activation of the reco rding will need
to be activated using the “Start Recording” button
File –
• Path – provide the path and name of the file where the recording is going to be saved.
• Prompt if overwrite – checked will prompt to overwrite when trying to record to a file
that alrea dy exists.
• Split in multiple files – checked will split the session as separate tracks, instead of one
large audio file. When splitting to separate tracks, a “Cut” button appears next to the
“Start Recording” button to demarcate tracks. The “Auto-split on crossfade” option will
automatically demarcate tracks when the crossfader in the VirtualDJ interface begins to
move to the deck being mixed in.
Form at – select the audio file format to be u sed when recording.
• WAV – will record a .WAV audio file
• MP3 – will reco rd an .MP3 audio file
• Encoder – this is the path to the M P3 encoder for use in recording the MP3. If the
encoder to use is in a different folder th an the VirtualDJ folder, use the browse button
( ,,, ) to navigate and select the encod er’s location
• Bitrate – select the bitrate to use in recording the MP3. A bitrate of 192Kbps is
recommended for CD-quality recording.
Once the choices are set, click “OK” and then “Start Recording” when ready. Press “Stop
Recording” when finished with the session.
52