
Page 41 - ALG Issue 2 2023
P. 41
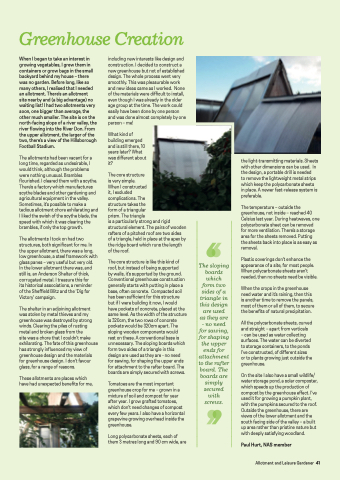
                                 Greenhouse Creation
When I began to take an interest in growing vegetables, I grew them in containers or grow bags in the small backyard behind my house – there was no garden. Before long, like so many others, I realised that I needed an allotment. There’s an allotment site nearby and (a big advantage) no waiting list! I had two allotments very soon, one bigger than average, the other much smaller. The site is on the north-facing slope of a river valley, the river flowing into the River Don. From the upper allotment, the larger of the two, there’s a view of the Hillsborough Football Stadium.
The allotments had been vacant for a long time, regarded as undesirable, I would think, although the problems were nothing unusual. Brambles flourished. I cleared them with a scythe. There’s a factory which manufactures scythe blades and other gardening and agricultural equipment in the valley. Sometimes, it’s possible to make a tedious allotment chore exhilarating and I liked the swish of the scythe blade, the speed with which it was clearing the brambles, if only the top growth.
The allotments I took on had two structures, both significant for me. In the upper allotment, there was a long, low greenhouse, a steel framework with glass panes – very useful but very old. In the lower allotment there was, and still is, an Anderson Shelter of thick, corrugated metal. I treasure this for
its historical associations, a reminder
of the Sheffield Blitz and the ‘Dig for Victory’ campaign.
The shelter in an adjoining allotment was stolen by metal thieves and my greenhouse was destroyed by strong winds. Clearing the piles of rusting metal and broken glass from the
site was a chore that I couldn’t make exhilarating. The fate of this greenhouse has strongly influenced my view of greenhouse design and the materials for greenhouse design. I don’t favour glass, for a range of reasons.
These allotments are places which have had unexpected benefits for me,
including new interests like design and construction. I decided to construct a new greenhouse but not of established design. The whole process went very smoothly. This was pleasurable work and new ideas came as I worked. None of the materials were difficult to install, even though I was already in the older age group at the time. The work could easily have been done by one person and was done almost completely by one person – me!
What kind of building emerged and is still there, 10 years later? What was different about it?
The core structure
is very simple.
When I constructed
it, I excluded
complications. The
structure takes the
form of a triangular
prism. The triangle
is a particularly strong and rigid structural element. The pairs of wooden rafters of a pitched roof are two sides of a triangle, held in place at the apex by the ridge board which runs the length of the roof.
The core structure is like this kind of roof, but instead of being supported
by walls, it’s supported by the ground. Conventional greenhouse construction generally starts with putting in place a base, often concrete. Compacted soil has been sufficient for this structure but if I were building it now, I would have pockets of concrete, placed at the same level. As the width of the structure is 320cm, the two rows of concrete pockets would be 320cm apart. The sloping wooden components would rest on these. A conventional base is unnecessary. The sloping boards which form two sides of a triangle in this design are used as they are - no need for sawing, for shaping the upper ends for attachment to the rafter board. The boards are simply secured with screws.
Tomatoes are the most important greenhouse crop for me – grown in a mixture of soil and compost for year after year. I grow grafted tomatoes, which don’t need changes of compost every few years. I also have a horizontal grapevine growing overhead inside the greenhouse.
Long polycarbonate sheets, each of them 3 metres long and 90 cm wide, are
The sloping boards which form two sides of a triangle in this design are used as they are - no need for sawing, for shaping the upper ends for attachment to the rafter board. The boards are simply secured with screws.
the light-transmitting materials. Sheets with other dimensions can be used. In the design, a portable drill is needed
to remove the lightweight metal strips which keep the polycarbonate sheets in place. A newer fast-release system is preferable.
The temperature – outside the greenhouse, not inside – reached 40 Celsius last year. During heatwaves, one polycarbonate sheet can be removed for more ventilation. There’s a storage area for the sheets removed. Putting the sheets back into place is as easy as removal.
Plastic coverings don’t enhance the appearance of a site, for most people. When polycarbonate sheets aren’t needed, then no sheets need be visible.
When the crops in the greenhouse need water and it’s raining, then this is another time to remove the panels, most of them or all of them, to secure the benefits of natural precipitation.
All the polycarbonate sheets, curved and straight – apart from verticals
– can be used as water collecting surfaces. The water can be diverted to storage containers, to the ponds I’ve constructed, of different sizes or to plants growing just outside the greenhouse.
On the site I also have a small wildlife/ water storage pond, a solar composter, which speeds up the production of compost by the greenhouse effect. I’ve used it for growing a pumpkin plant, with the pumpkins secured to the roof. Outside the greenhouse, there are views of the lower allotment and the south facing side of the valley – a built up area rather than pristine nature but with deeply satisfying woodland.
Paul Hurt, NAS member
         Allotment and Leisure Gardener 41
