
Page 8 - ZVPLasty - Hensler Technque Guide - 2021
P. 8
ST-007 rev-4
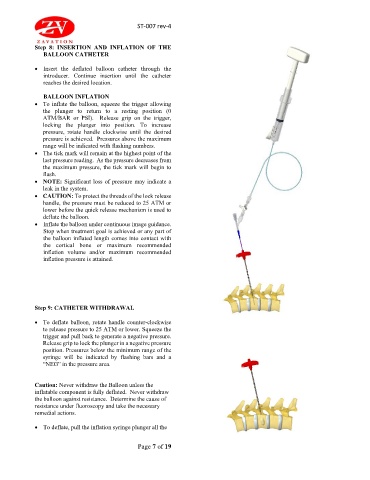
Step 8: INSERTION AND INFLATION OF THE
BALLOON CATHETER
• Insert the deflated balloon catheter through the
introducer. Continue insertion until the catheter
reaches the desired location.
BALLOON INFLATION
• To inflate the balloon, squeeze the trigger allowing
the plunger to return to a resting position (0
ATM/BAR or PSI). Release grip on the trigger,
locking the plunger into position. To increase
pressure, rotate handle clockwise until the desired
pressure is achieved. Pressures above the maximum
range will be indicated with flashing numbers.
• The tick mark will remain at the highest point of the
last pressure reading. As the pressure decreases from
the maximum pressure, the tick mark will begin to
flash.
• NOTE: Significant loss of pressure may indicate a
leak in the system.
• CAUTION: To protect the threads of the lock release
handle, the pressure must be reduced to 25 ATM or
lower before the quick release mechanism is used to
deflate the balloon.
• Inflate the balloon under continuous image guidance.
Stop when treatment goal is achieved or any part of
the balloon inflated length comes into contact with
the cortical bone or maximum recommended
inflation volume and/or maximum recommended
inflation pressure is attained.
Step 9: CATHETER WITHDRAWAL
• To deflate balloon, rotate handle counter-clockwise
to release pressure to 25 ATM or lower. Squeeze the
trigger and pull back to generate a negative pressure.
Release grip to lock the plunger in a negative pressure
position. Pressures below the minimum range of the
syringe will be indicated by flashing bars and a
“NEG” in the pressure area.
Caution: Never withdraw the Balloon unless the
inflatable component is fully deflated. Never withdraw
the balloon against resistance. Determine the cause of
resistance under fluoroscopy and take the necessary
remedial actions.
• To deflate, pull the inflation syringe plunger all the
Page 7 of 19