
Page 14 - QR IMER MIX120PLUS
P. 14
IMER INTERNATIONAL S.p.A. GB
MIX 120 PLUS
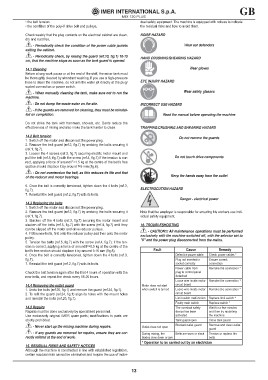
• the belt tension. dual safety equipment. The machine is equipped with notices to indicate
• the condition of the poly-V drive belt and pulleys. the residual risks and how to avoid them.
Check weekly that the plug contacts on the electrical cabinet are clean, NOISE HAZARD
dry and rust free.
Wear ear defenders
- Periodically check the condition of the power cable jackets
exiting the cabinet. HAND CRUSHING/SHEARING HAZARD
- Periodically check, by raising the guard (ref.10, fig.1) 10-15
cm, that the machine stops as soon as the tank guard is opened.
14.1 Cleaning Wear gloves
Before a long work pause or at the end of the shift, the mixer tank must
be thoroughly cleaned by abundant washing. If you use a high-pressure EYE INJURY HAZARD
hose to clean the machine, do not aim the water jet directly at the plug/
socket connection or power switch. Wear safety glasses
- When manually cleaning the tank, make sure not to run the INCORRECT USE HAZARD
machine. Read the manual before operating the machine
- Do not dump the waste water on the site.
- If the guards are removed for cleaning, they must be reinstal-
led on completion.
Do not strike the tank with hammers, shovels, etc. Dents reduce the TRAPPING/CRUSHING AND SHEARING HAZARD
effectiveness of mixing and also make the tank harder to clean.
14.2 Belt tension Do not remove the guards
1. Switch off the motor and disconnect the power plug. Do not touch drive components
2. Remove the belt guard (ref.2, fig.7) by undoing the bolts securing it Keep the hands away from the outlet
(ref.1, fig.7).
3. Loosen the 4 screws (ref.3, fig.7) securing electric motor mount and
pull the belt (ref.5, fig.7) with the screw (ref.4, fig.7) if the tension is cor-
rect, applying a force of around F=1.5 kg at the centre of the belt’s free
section should displace it by around f=5 mm (fig.8).
- Do not overtension the belt, as this reduces its life and that
of the reducer and motor bearings.
6. Once the belt is correctly tensioned, tighten down the 4 bolts (ref.3, ELECTROCUTION HAZARD
fig.7). Danger - electrical power
7. Reinstall the belt guard (ref.2, fig.7) with its bolts.
Note that the employer is responsible for ensuring his workers use indi-
14.3 Replacing the belts vidual safety equipment.
1. Switch off the motor and disconnect the power plug.
2. Remove the belt guard (ref.2, fig.7) by undoing the bolts securing it 16. TROUBLESHOOTING
(ref.1, fig.7).
3. Slacken off the 4 bolts (ref.3, fig.7) securing the motor mount and - CAUTION!!! All maintenance operations must be performed
slacken off the belts (ref.5, fig.7) with the screw (ref.4, fig.7) until they exclusively with the machine switched off, with the selector set to
can be slipped off the motor and drive reducer pulleys. "0" and the power plug disconnected from the mains.
4. Fit the new belts, first onto the reducer pulley and then onto the motor
pulley. Fault Cause Remedy
5. Tension the belts (ref.5, fig.7) with the screw (ref.4, fig.7): if the ten-
sion is correct, applying a force of around F=0.9 kg at the centre of the Defective power cable Check power cables *
belt’s free section should displace it by around f=10 mm (fig.8).
6. Once the belt is correctly tensioned, tighten down the 4 bolts (ref.3, Plug not inserted in Ensure correct
fig.7). socket correctly connection
7. Reinstall the belt guard (ref.2, fig.7) with its bolts.
Power cable from Remake the connection *
Check the belt tension again after the first 4 hours of operation with the plug to control panel
new belts, and repeat the check every 18-20 hours. detached
14.4 Removing the outlet guard Motor does not start Loose wire inside motor Remake the connection *
1. Undo the bolts (ref.20, fig.1) and remove the guard (ref.24, fig.1). when switch is turned circuit board Remake the connection *
2. To refit the guard (ref.24, fig.1) align its holes with the mount holes
and reinstall the bolts (ref.20, fig.1). Loose wire inside motor
circuit board
14.5 Repairs
Repairs must be done exclusively by specialised personnel. Limit switch malfunction Replace limit switch *
Use exclusively original IMER spare parts; modifications to parts are
strictly prohibited. Faulty main switch Replace switch *
- Never start up the mixing machine during repairs. The overload safety Wait for a few minutes
device has been and then try restarting
- If any guards are removed for repairs, ensure they are cor- activated the machine
rectly refitted at the end of work.
Tank guard open Close tank guard
15. RESIDUAL RISKS AND SAFETY NOTICES
Although the machine is constructed in line with established legislation, Outlet does not open Blocked outlet guard Remove and clean outlet
certain residual risks cannot be eliminated and require the use of indivi- guard
During mixing, the Belts are worn or slack Tension or replace the
blades slow down or jam belts
* Operation to be carried out by an electrician
13