
Page 65 - The Decorative Painter Fall 2016
P. 65
Now you can add Snow (Titanium) White highlights with a no. 10 flat shader, slip-slapping white in the center of both arms, his head and also in the middle of the scarf sections. It’s easiest to do this before facial and scarf detail- ing is in place; however, you can reinforce the whites over and over as you go before adding hard shines.
STEP THREE
Trace the facial features and snowberries. Use white graphite – do not use Chacopaper because you probably won’t be able to see the lines. Rub your fingers across the traced lines. Your hands cannot be freshly washed, as the lines come up by transferring some of your skin oil to the lines. If you still can’t see them, go find a bit of house dust and rub this onto the lines.
Undercoat the snowberries with Bleached Sand and the shade them with a bit of the Midnite Green+Charcoal Grey (2:1) mix using a no. 4 flat shader in a curve along the left and bottom of each berry. Add more shading where one berry falls behind another. Add the blossom end with Midnite Green and highlight with Snow (Titanium) White. Stroke in the leaf simulations with a no. 6 filbert and Light Avocado, shading with Plantation Pine and highlighting the curved tips with Citron Green.
Outline the eyes and draw in the mouth line with Charcoal Grey. Lightly fill in the coal eyes with the Mid- nite Green+Charcoal Grey (2:1) mix and then add a pupil with Lamp (Ebony) Black. Add a line of reflected light with Burnt Sienna along left and bottom outside of the pupil. Highlight outside of the coal and on the eyes and cheeks with Snow (Titanium) White. Outline the carrot nose with Burnt Sienna. Wash the nose with Spiced Pumpkin and then shade with a hint of Burnt Sienna. Highlight with Snow (Titanium) White. Tint the cheeks with a hint of Burnt Sienna.
STEP FOUR
Hatband and scarf detailing give us endless choices. Use the colors you like or stick with one of my three options.
(See various color examples on the previous page.) Lines from fine to wide can be added in one or more colors. The width of your brush will determine the width of your stripes so you can choose a different size than mine. Load the brush full across, but not too heavily; just enough to pull a full, even stripe. If you don’t make it, allow it to dry, then reload color and pull across it a second time. Always begin to pull stripes parallel with the scarf outer ends. Start with the wid- est stripe color, being sure to determine how far apart you need to space the first stripes to leave room for two more additional stripe widths. Remember to break the line a bit if it crosses a fold shadow or curve if it seems necessary. Be sure that you are floating shading colors across the width of the stripe and not on the length, no matter how small, beginning at either end and fading to nothing in the middle. Add slightly more shading if the stripe disappears against a more forward surface. Pull more Snow (Titanium) White to highlight going right across stripes. You can repeat this with each different set of stripe widths.
Note the spacing and angles of the plaid stripes on the scarf. I began first color on outer scarf ends and crossed stripes diagonally with my second color. Note that these stripes are at more of an angle. Keep enough space be- tween them to match the first color placement as much as possible. Follow and renew the same overall white high- light path. Following the first stripe, but crossing over the second stripe, use the no. 1 liner and add a wiggly line of Spiced Pumpkin.
Note: It might be fun to paint one or more of Viking Woodcraft’s 2" or smaller snowflakes Snow (Titanium) White, and when the paint dries, cover the surface with a waterbased varnish and sprinkle with DecoArt Glamour Dust. Go to www.vikingwoodcrafts.com and type in “snowflakes” and you will see several choices. The ones I’ve enclosed are old, but any shape is great! As an afterthought, I just added a few drifts of snow using a no. 10 flat shader and put thick, floated Snow (Titanium) White on his hat, etc. While the paint is still really wet, sprinkle with DecoArt Glamour Dust, tipping excess onto clean paper. Blow the dust off and have fun adding them to lots of projects!
ACRYLIC
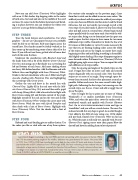
artist’s sketch
Jean Zawicki began rosemaling in the mid-1960s and took up teaching within two years. In the late 1960s and ’70s decorative painting caught on like wildfire, and there was great demand for classes. She joined SDP in 1976. From 1978 to 2008 Jean travel-taught, and to date she has written 29 books and dozens of packets. Jean held booths at SDP Conferences from 1978 through 2000. She finds it refreshing to have students who are interested in a large variety of subjects, especially her favorites: fruit and flowers. Currently, retirement allows Jean to indulge in her passion to create fired, hand-painted china. You can write to Jean at 430 Louisiana Ave., St. Cloud, FL 34769; call her at (407) 892-6383; or email her at jzawicki@cfl.rr.com.
DECORATIVEPAINTERS.ORG
The Decorative Painter • ISSUE NO. 3, 2016 63
