
Page 64 - The Decorative Painter Fall 2016
P. 64
ACRYLIC
Jean Hansen Publications
VARIOUS COLOR EXAMPLES
RED/GREEN DOOR TOPPER
Color #1: Basic medium value: Brilliant Red shaded with Napa Red
Color #2: Shading color: Light Avocado shaded with Plantation Pine and highlighted with Citron Green
Color #3: Lightest value when used: Golden Straw shaded with Raw Sienna and high- lighted with Snow (Titanium) White
YELLOW/RUST PLAID TOPPER
Color #1: Moon Yellow shaded first with Cocoa, then adding a few deeper values with Raw Sienna
Color #2: Raw Sienna shaded with Burnt Sienna
Color #3: Spiced Pumpkin wiggly line
SNOWFLAKE SNOWMAN
Color #1: Williamsburg Blue shaded with Deep Midnight Blue
Use a liner and Snow (Titanium) White to paint snowflakes on the hat and high-
light scarf and hatband.
LET’S PAINT
STEP ONE
Using the 3⁄4" angular shader, float in the top of the hat with Midnite Green. Switch to the 3⁄8" angular shader and float in the brim of the hat also with Midnite Green. I painted the 1⁄2" thickness edge of each area of the cutout at the same time as the top surfaces were done.
With the 3⁄4" angular shader, float the snowman parts, the hatband, and his scarf with Bleached Sand. I usually leave a very thin line where same color areas join. If you’re good at floating color, you can do the entire background for color areas first with floated color, then add washes including that reserved line until the background is neutralized. If you’re not so good you might float in the outside edges of each area, then slip-slap on the background with X-strokes. When this is pretty much covered, you can then do some washes. Don’t worry if the snow areas have a bit of value varia- tion. To apply washes, lightly load a angular brush and go right over these reserved separation lines. This allows you to still maintain a slight indication of the area separa- tions.
STEP TWO
The black hat is shaded with Lamp (Ebony) Black. Try to reserve a bit less paint in the forward area just right of center on the top and also in the middle along the hat brim. Add Lamp (Ebony) Black toward the topside of the brim and make it darkest in the little corners of the inside of the hat that are next to his head. Here is a great place to create a lost line by pulling a small bit of color from the triangle of Lamp (Ebony) Black in that deepest point, and fading away under the hat brim by about an inch onto the snowman color.
Very lightly float in the shadow on the snowman body areas and the scarf with Midnite Green+Charcoal Grey (2:1). I make this mix by the bottle and find that I use it a lot where neither parent color is quite right. Float this mix lightly using the 3⁄4" angu- lar brush, leaving a small line of the background along the curved edges for reflected light with the initial float. Put a little more shading mix across the top of his head just under the hat brim.
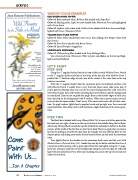
Announces the release of a first in a new series
Wild Flowers by the Side of the Road
Golden Rod #242
Chicory #239
Queen Ann’s Lace #235
All available in the 5 x 7, 8 x 10, and 11 x 17 sizes. Ask about our coordinated Mat and Frame Combos.
Place orders now for these new “Stencils with a Difference” at
JeanHansen.com (603)986-6646
Come Paint With Us...
...Join A Chapter
62 The Decorative Painter
• ISSUE NO. 3, 2016 DECORATIVEPAINTERS.ORG
