
Page 28 - The Decorative Painter Spring 2018
P. 28
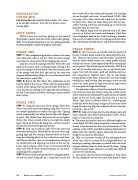
PREPARATION COLOR MIX
Pale Yellow Mix: Buttermilk+Yellow Ochre (2:1). Store in an airtight container. Trace the two patterns onto tracing paper.
LET’S PAINT
NOTE: I have not used any glazing on the painted illustrations to better show the actual colors before glazing. Refer to the finished painting to see how glazing provides the desired depth to make the brighter areas glow.
STAGE ONE
STEP 1: The background application is done at the same time while each color is still wet. Soak the entire sponge squeezing out excess water till the dripping has ceased.
Load one area of the sponge with Pale Yellow Mix and apply to the canvas with a swirling motion starting at the top and ending two-thirds down. Now load another area of the sponge with Blue Mist and swirl in the same way stopping halfway down. Where the two colors meet, blend the same way to avoid a line.
STEP 2: Repeat the Pale Yellow Mix application on the bottom third of the canvas. While still wet, load another section of the sponge that has mostly holes with Raw Si- enna. Tap this on starting at the right side and working to the left. Leave plenty of yellow showing to form mottled look. Let dry.
STAGE TWO
STEP 1: Using the same area of the sponge where Raw Sienna was used, repeat the tapping using Raw Sienna on the second application to darken the right side. Tapping mostly horizontally, trail off on the left side with “fingers” of paint. This should leave the lower left corner lighter. Notice that I have created a hill on the right that slowly tapers down on the left. By doing this, we have created a horizon line between the ground and sky.
STEP 2: Next, tap on Hauser Light Green the same way above the horizon line. Notice that the tree line varies, sug- gesting high and low treetops. Proceed down to the ho- rizon line allowing plenty of sky to show here and there. Add Hauser Medium Green in the midsection starting at the horizon line and stopping two-thirds of the way up. Lastly, tap on Hauser Dark Green to the lower half the same way. NOTE: There should be plenty of “sky holes” remaining when completed.
STEP 3: Trace on the mid-ground trees using grey graph- ite and the stylus. Using the no. 1 script liner brush and
Raw Umber fill in the trunks and branches. For the large tree on the right, use the no. 3 round brush. NOTE: Thin the paint with a little water and work into the bristles for better flow. There are many fill-in trees that are one- strokes starting at the base and pulling up, as well as tiny branches done the same way.
The slightly larger trees are painted with a bit more pressure to thicken the trunks and branches. Paint Raw Sienna highlight bark on the trunks and larger branches with a stutter-stroke the same way starting on the left sides. This will indicate the light source and provide dimension.
STAGE THREE
STEP 1: The tree leaves are painted with the corners of the no. 12 trident brush. Look at the chisel edge of the bris- tles – there are three corners and three sides. To properly load the trident brush corner, use a small puddle of paint and dip one corner in the edge and tap off the excess paint on the palette. This will also open the bristles. NOTE: Do not wet the bristles with water; this is a dry-brush tech- nique. Start with the many small and medium size trees first using Hauser Medium Green. Tap on leaf clumps leaving plenty of sky holes. Repeat for more leaf clumps working in a small section, then moving to a new area the same way. Lastly, paint the larger tree on the right with a bit more paint for larger leaf clumps.
The next color is Hauser Dark Green painted at the bot- tom of the previous leaf clumps using the second corner of the trident brush. Remember to paint the leaves slightly larger on the tree to the right. The last color is a mix of Hauser Light Green+Cadmium Yellow (1:1 = yellow green) to the tops of the leaf clumps using the third corner of the brush the same way. Wipe the trident brush on a clean pa- per towel – do not wet.
STEP 2: Add a few twigs over the leaf clumps, here and there, using the mini liner brush and Raw Umber. At this point, it is time for an evaluation.
a. The reason the smaller trees are at different heights is to create depth. NOTE: Look at the pattern, some are not an- chored to the horizon line but seem to float above it. The solution to this will be provided in glazing information to follow. Not only will they appear anchored, but also have shadows necessary for dimension.
b. Why is it necessary to paint all the mid-ground trees when some will be covered by the foreground trees? In landscape painting, dimension is created with each layer of paint working from the back toward the front. Trying to fill in between larger elements is actually more difficult and not very convincing.
c. Also notice that the leaves look lighter as they touch the sky. Simply do not use too much dark green in these
26 The Decorative Painter • SPRING 2018
DECORATIVEPAINTERS.ORG
