
Page 34 - The Decorative Painter Winter 2017
P. 34
Painter’s Checklist
SURFACE
Flat surface 9" x 14.5"
(22.86 x 36.83 cm)
or any surface of same proportions
PALETTE
DECOART AMERICANA ACRYLICS Avocado (or Hammered Iron,
if you have it)
Bittersweet Chocolate (BC) Burnt Umber (BU)
Buttermilk (BM)
Eggshell (ES)
Grey Sky (GS)
Honey Brown (HB)
Lamp (Ebony) Black (B) Mocha (MO)
Navy Blue (NB)
Raw Umber (RU)
Sable Brown (SB)
Slate Grey (SG)
Snow (Titanium) White (W) Traditional Burnt Sienna (TBS) Yellow Ochre (YO)
Zinc (ZN)
BRUSHES
You may wish to change the size of the drawing, so brush sizes are not specified. Use the biggest sizes you can of flats, liners, mops, and scumblers.
SUPPLIES
Basic painting supplies (page 96) DecoArt Glazing Medium DecoArt DuraClear Satin Varnish DecoArt Multi-Purpose Sealer T-square or see-through ruler
Rag
Fine roller Wood filler Hair dryer
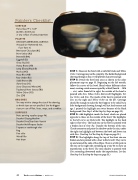
STEP 1: Basecoat the bowl with a wide flat brush and Yellow Ochre. Coverage may not be complete. The darker background showing through is fine, it will provide character and age. STEP 2: Divide the bowl into areas as shown in the color placement map on page 35. Beginning on the left outside, follow the curves of the bowl. Blend where different colors meet, creating a wide area occupied by a third (fourth ... fifth ... etc.) color. From left to right, the outside of the bowl is painted with Zinc, Yellow Ochre, Buttermilk (highlight), Yel- low Ochre, and Zinc. The inside of the bowl is painted with Zinc on the right and Yellow Ochre on the left. Coverage should be enough to make the bowl appear to be solid, but a little background showing through will just lend texture and age. I painted the highlight area twice because of the black background. (See Step 1 of the Step-by-Steps on page 33.) STEP 3: Add highlights inside the bowl; which are placed opposite to those on the outside of the bowl. The highlights in the left curve are Buttermilk. The highlight in the back right is Slate Grey. The back rim on the bowl is painted with a broken line of Grey Sky. Transfer the bottom of the rim. Check symmetry and paint the shadow under the rim, under the right rim highlight and between the bowl and lower rim with Zinc. (See Step 2 of the Step-by-Steps on page 33.) STEP 4: The highlights along the top of the front rim are broken and are painted with a liner in Buttermilk. They curve up and around the ends of the ellipse. There is a little peak in the rim on the right side; extending up a tiny bit to show an imperfection in the bowl. The rim’s shadow is painted with Zinc; extending downward under the imperfection. Let dry. (See Step 3 of the Step-by-Steps on page 33.)
32 The Decorative Painter •
WINTER 2017
DECORATIVEPAINTERS.ORG
