
Page 48 - The Decorative Painter Spring 2018
P. 48
ACRYLIC
of the brush you’ll use next. You want the color to fade to water by three-fourths of the width of the brush, so don’t keep walking out to blend and then have a great next load. Neat and tidy! What you see on the blending path is exactly what you will have in the brush when you move the color onto your project. This works on paper as well as other surfaces. It creates that softer effect that many of you admire. The color goes exactly where you intend it with strong outside defining lines and a soft fade to nothing end of color in center areas of the sections of the design.
In my classes, I’ve always referred to this initial step as “ghosting in.” I hate basecoating. It always seemed to grow in areas it shouldn’t and then you had to work all the harder to make things right. I use a light to medium value from each area of the design and find all the parts, beginning in the most forward part of the design and work my way back into it. I correct as I go so each makes sense in relation to the previous portion that was worked on. Once all the design areas are found, light washes can be applied until background color is sufficiently neutralized. Just be sure to dry each wash completely to avoid lifting spots of color, which are extremely hard to patch.
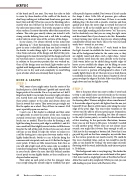
ROSE & LEAVES
STEP 1
of the petal’s shape as needed. Don’t worry if it isn’t exactly the shape I drew. Little lifts of pressure give softness and delicacy to those outside lines. If there is an inside defining line, I do that with a smooth, even line and then quickly pull from the outer edge in toward the heart of the flower to fill in the middle part of the petal. I often leave some light streaking to let the viewer “see” the curve, but be absolutely sure that you are using the right curve and directional flow if you choose to do this. Remember to keep turning your work so that you are always pulling comfortably toward your body. This is the way our hand works best—toward us, not away.
Use a no. 10 flat shader or 1⁄2" wash brush to float the Light Avocado to establish the leaves. Leave a narrow line of the background color for the center vein, as they are slightly raised and often catch a light shine. Center veins always travel from the stem directly to the leaf tip. Little worm holes can be added along outside edges of leaves as you establish the shapes just by lifting to create little "half circle indents" along any edge. For holes, you need to reserve a portion of background to show. I will usually lightly float a bit of Charcola Grey or dark brown to establish my holes. That way it doesn't matter If a bit of green overlaps the edges of the hole. Side veins fall out and angle down and can be slightly curved.
STEP 2
Here is the point where you start to refine. I went back to Step 1 and added some curved streaks on the various petals so they would show up a bit better. I also examined thelayeringeffect.Warmerorlightervaluescomeforward. Is the outside edge of a petal a bit lighter than the one just beneath? If not, float in a little more color along the outer edge of the petal edge. You want value variation or the viewer won’t be able to tell your petals apart. Remember, every petal falls outward, uncoiling, but they all connect to the calyx (center point), so watch the directional flow of that streaking. In this particular illustration, because there was no leaf there to fill space, I decided I needed to add another petal. While roses are not always exact rounds, you might like it better. Easy enough to add, as I did just for this example at bottom left. Note that if you go petal by petal on the three examples, my outside lines on the various petals do not match exactly. We could do this rose a hundred times, and no two would be exactly alike, as you should be “feeling” the outer edges of petals fluttering with the wind, individually, each time you paint it. It’s delicate.
This background color is very forgiving. The darker the background the more washes you would need at this point. I feel mine needs a single light wash of the Bleached Sand. Allow this wash to dry completely. While you wait, you can add shading on your leaves with Plantation Pine.
Well, some of you might notice that the center of the finished piece is a little different. I goofed and started with larger petals at the outside. Do as I say and not as I did! I forgot how hard it was to make the center a tight coil unless you started there and worked outward! Visualize where those petals connect to the calyx and always direct any lines in toward this center. They never just go straight out like the spokes on a wheel. They all have to connect. Pull apart a partially open rose and see.
I used a no. 4 flat shader to sideload and float color on tight petals to create the center of the rose. Continue outward several tiers with Bleached Sand, increasing the brush size as needed. Place the color by floating a soft, light line along the outer petal edge to establish it, and if it was a small roll, float slightly curved strokes to fill between lines for the roll of the petal. It’s fine if you see just a bit of soft line as you blend. It helps the viewer to realize it is a roll by leaving just a tiny space between strokes with a lightly loaded brush. Switch to a no. 6 flat for doing the narrower mid-size petals, and a no. 8-10 flat for the largest outer petals. If there are little missed areas that’s fine, as you will add a light wash of the same color as needed to neutralize background. Working with a light floated load in your brush allows the area that falls behind another tier of petals to stay slightly darker, as they usually are in deeper shadow anyway.
Float color on each petal so that the strongest value runs crisply along the outside edge to establish that part
46 The Decorative Painter • ISSUE NO. 2, 2016
DECORATIVEPAINTERS.ORG
