
Page 108 - The Decorative Painter Winter 2014
P. 108
OIL
side, and so I painted on the smooth inside glass. Oil paint will generally adhere well to smooth glass—but only if the glass is kept perfectly clean. Any oil from your hands, however minute, can foil your best efforts. Wearing thin fabric gloves may be a solution.
The term reverse painting is done on a transparent surface, usually glass. It describes the obvious (paint- ing onto the back of glass), but—more important to the painter—also the fact that the painting is executed in reverse order. Rather than working from the back for- ward, you begin with the images closest to the viewer. You may sign your work before anything else, or at least in the early stages. You primarily work with transparent glazes so that, outside sharp outlines, light can penetrate through the painting. If it does not, you may wind up with a black faux paper cutout on glass.
While you may use your choice of paints, my personal preference is a good-quality artist-grade oil and compat- ible medium because of its time-tested versatility and durability. Oil paint will cling well even on smooth (yet clean) glass surfaces. However, there are many other ma- terials available that hold great promise.
As for brushes, for fine work I settle for only the best. I use brushes that do not fight my effort but rather dance with me as I lead.
Common designs you’ll find on shades are landscapes, flora and fauna of different type and style, and stained glass imitations. Rarely will you find any form of portrait.
The design shown is more or less a monotone land- scape that is easy to incorporate into your home’s “land- scape.” The picture is a panorama, so it is best to imagine yourself at the center, inside the dome (globe), turning on your axis and looking out in
all directions at the landscape.
After making a pencil sketch of this design, I refined the sketch by drawing with ink on vellum in order to have a strong, very transparent design to attach to the
surface that can be seen
clearly through the glass. One could draw, perhaps with a grease pencil, the design directly onto the outside of the glass. However, if you do this be absolutely sure that this can later be cleaned off.
If you work in a well-lit room, perhaps by the window, it should be easy to follow the lines and shapes of the de- sign. I happen to work on rather gloomy days and opted to use a small light table.
To reiterate, product and tool selection is your choice. And since products not only vary in type but also color, quality, and pigmentation, I will refrain from giving de- tailed recipes. Rely on your eyes, experience, and taste to copy or adjust what I used.
PREPARATION
Cut a piece of vellum from the center ring out and ensure it fits the contour of your shade. Transfer the de- sign onto the vellum with a black permanent pen. Start- ing at the top of the shade and moving down to the base of the shade, separate the design into eight equal pie slices, marking these lines lightly with a pencil. Care- fully cut out each portion and tape it into place on the outer surface of the shade.
I worked in five stages (steps) over five days, letting the paint dry after each step to give me the best control and to prevent accidents and muddling of colors and shapes.
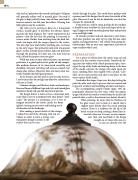
The accompanying sample boards (page 105) ap- proximately illustrate the five steps, while the photos (page 108) show the work as viewed from the inside (the painted side) as well as the exterior (see below) when lit.
When painting, be aware that the thickness of the glass causes you to look at a sketch that is slightly more distant than the actual painting surface. There is a tendency for the tip of the brush to aim too deep, creating a broad line in- stead of a fine one. It is easy to overcompen- sate. Also, you need look at the design straight on, at times with one eye, so you are directly over the
