
Page 56 - The Decorative Painter Winter 2014
P. 56
my mother made the best pies ever. I never could, so instead of having her rolling pin lie dormant in my kitchen cupboard, I painted this wonderful token of her
memory. It holds my bracelets in such a pretty fashion.
PREPARATION
Lightly sand the rolling pin and wipe clean with a tack cloth. Seal the rolling pin with DecoArt Americana Multi- Purpose Sealer. Let dry and then sand again. Wipe clean with a tack cloth.
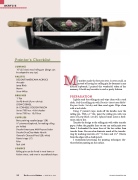
Using 1" painter’s tape, mask off the handles near the rolling pin. With a 1" flat, paint the rolling pin with two coats of Lamp Black. Let dry. I placed mine across a bath- room sink to dry.
Transfer the design to the rolling pin with white transfer paper. Soften the graphite lines so you can easily paint over them. I freehanded the inner lines of the lace rather than transfer them. You can also eliminate much of the transfer- ring by marking intervals of 1" (2.5cm) and 11⁄2" (3.8cm) from the edges with a chalk pencil.
I recommend practicing the painting techniques else- where before painting on the surface.
dEcOratIvEpaINtErS.Org
ACRYLIC
Painter’s Checklist
SuRFACE
10" (25.4cm) wood rolling pin (design can be adapted to any size)
PALETTE
DECOART AMERICANA ACRYlICS Avocado
lamp Black
Mauve
Snow White
BRuSHES
1" flat
Scruffy brush (of your choice) lOEW-CORNEll
lA CORNIEllE gOlDEN TAklON Series 7300 nos. 4 & 6 shaders Series 7350 no. 10/0 liner
SuPPLIES
Basic painting supplies (page 128)
3⁄4" pinewood (optional, for making rolling pin holder)
DecoArt Americana Multi-Purpose Sealer DecoArt DuraClear Matte Varnish general’s Charcoal Pencil (2B, white) Painter’s tape (1")
Ruler
Tack cloth
SOuRCE
Rolling pins can be found in most home or kitchen stores, and even in secondhand shops.
54 The Decorative Painter • ISSUE NO. 4, 2014
