
Page 58 - The Decorative Painter Winter 2014
P. 58
ACRYLIC
LET’S PAINT
LACE
STEP 1: Using a no. 10/0 liner, paint lines with Snow White. I freehanded the loops of the lace. To freehand, hold the rolling pin in your left hand (if right-handed), turning the rolling pin as you apply the brush to the sur- face. Let the turn of the rolling pin do most of the work. I paint all the horizontal lines first to get a rhythm before filling in the vertical lines. If you make a mistake, touch up with a small shader brush and Lamp Black.
STEP 2: Using a stylus, add three vertical dots in between each lace loop, referring to the photo. Let dry.
BORDER ROSES
Sideload a no. 4 shader with Mauve and Snow White. Paint the roses on the ends of the rolling pin as follows, referring to the Step-by-Step on page 55.
STEP 1: Paint the arch on top.
STEP 2: Paint the lower cup under the arch.
STEP 3: On the right side of the rose in the middle of the “cup,” paint two comma-strokes using a press-and-release motion to taper each petal.
STEP 4: On the left side of the rose in the middle of the “cup,” paint two comma-strokes using a press-and-release motion to taper each petal.
CENTER ROSE
In the center of the doily, use a no. 6 shader to paint the rose, referring to Steps 1–4 above and the Step-by-Step on page 55.
LEAVES
Load a no. 4 shader with Avocado and Snow White. Add leaves next to the border roses as follows, referring to the Step-by-Step on page 55.
STEP 1: Add a leaf to the right of the rose. Press and release the brush horizontally as you curve to the right and up.
STEP 2: Add a leaf to the left of the rose. Reverse the brush, press, and release curving up.
Following Steps 1 and 2, place two leaves on each side of the center rose using a no. 6 shader. With a no. 10/0 lin- er and Avocado, paint the leaf vein and stem (see photo on page 55). Highlight the vein and stem with Snow White.
STATICE FLOWERS
Using a scruffy brush and Snow White, dab around the roses as shown in the photo. Be sure to dab the load- ed brush onto a paper towel before painting the flowers, which should be light and airy. Let dry overnight.
FINISHING
Apply two coats of DecoArt DuraClear Matte Varnish, allowing each coat to dry thoroughly. Display your piece on a rolling pin holder (see instructions below) or hang with pretty ribbons by the handles.
ROLLING PIN HOLDER
Refer to the diagram on page 57 to build the holder. Cut a base piece from the 3⁄4" pinewood that measures 12" x 21⁄2" (30.5 x 6.4cm). Cut two side pieces that each measure 41⁄2" x 21⁄2" (11.4 x 6.4cm). Sand the wood, then glue and nail to assemble. Seal with DecoArt Americana Multi-Purpose Sealer. Paint with two coats of Lamp Black.
To make the lace pattern, measure and mark the center of the base at 56⁄16". Draw lines from the center point to the top two corner points of the base to create a guide. Paint the lace the same as for the rolling pin, using the photo as a reference.
artist’s sketch
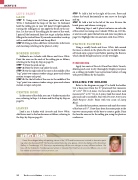
Dawn House began taking tole painting classes in the 1970s and became more involved in decorative paint- ing when she discovered SDP. Her favorite painted items are wine glasses, which she displays at the Downtown Gallery in Ticonderoga, N.Y. She enjoys experimenting with her own designs on many different surfaces. She lives with her husband in Ticonderoga and winters in Sarasota, Fla. Email her at dawnnybuoy@gmail.com, or visit her website at dawnnybuoy.artistgalleryonline.com.
56 The Decorative Painter • ISSUE NO. 4, 2014
decorativepainters.org
