
Page 91 - The Decorative Painter Summer 2018
P. 91
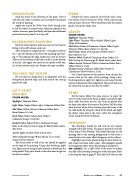
PREPARATION
Sand the wood in the direction of the grain. Dust it with the tack cloth so all dust can be removed to prepare the wood for painting.
Apply one coat of the White Stain Sealer letting it dry to seal the wood. It assures better adhesion of paint to the surface, increases paint durability, and provides additional protection for the wood. Let it dry well.
BACKGROUND PAINTING
Paint the entire box first with two coats of Cool Neutral, letting it dry well between each coat.
After the paint is completely dry – overnight is a better bet – tape the bottom of the box with masking tape leav- ing 1⁄2" for painting the edge. Apply two coats of Antique Maroon to the bottom of the box as well as to the bottom of the lid. Also apply two coats on the inside of the box. Let it dry between each coat. Remove the tape carefully.
TRACING THE DESIGN
Be sure that the design line is in alignment with the background painted edge and then attach the tracing paper with tape.
STEMS
Outline the stems using the liner brush with a mix- ture of Raw Umber+Titanium White. With a dirty brush pick up more Titanium White and blend with the outline gently to keep the shape clear.
LEAVES
COLOR MIXES:
Highlight: Titanium White
Light Value: Titanium White+Naples Yellow Light+ Oxide of Chromium
Mid Value: Oxide of Chromium+Naples Yellow Light+ Titanium White+Raw Umber (1:1:tch:tch)
Dark Value: Oxide of Chromium+Yellow Ochre+
Raw Umber (1:1:1)
Darkest Value: Oxide of Chromium+Raw Umber (2:1) Refer to Step-by-Step on page 87. Blend where colors meet. Yellow Accent: Titanium White+Cadmium Yellow Pale+ Yellow Ochre (1:1:tch)
Orange Accent: Cadmium Yellow Pale+Oxide of Chromium+Yellow Ochre (1:1:tch)
Use a small amount of this mixture. Start to place the accent color on the edge of the painting. Using a dry- brushing mixture, apply very light pressure using Circular motion to blend into the background. Wipe your brush so the color does not go too far into the subject.
VEINS
All the leaves follow the same process to paint the veins. Use the chisel of the brush to apply a mix of the light value while the leaves are wet. The veins are placed over the dark value above the center of the leaves. Pull the color from the base of the leaves starting from the stems to the tip. Add shade by using the chisel of the brush and apply the darker value next to the veins. After dry, strengthen values using dry-brush technique.
DEWDROPS
The dewdrops should be soft and do not require strength of the dark values. The paint is placed on one side of the shape of the dewdrop. Then blend the paint on the opening side to the existing background. It will create a natural look as the water effect disappears on the subject.
Highlights need to be placed using the liner brush, to- tally clean, free from other colors. The highlights should be strengthened later when the painting is completed. ON LEAVES: Use a Light Value of the leaves to outline one side of the dewdrop, leaving the other side open. Refer to the Step-by-Step on page 87. Place the Dark Value on the
LET’S PAINT PEACHES
COLOR MIXES:
Highlight: Titanium White
Light Value: Naples Yellow Light+Cadmium Yellow Pale
Mid Value: Yellow Ochre+Cadmium Yellow Pale+ Burnt Sienna (1:1:tch)
Dark Value: Yellow Ochre+Raw Umber+ Cadmium Orange (1:tch:tch)
Darkest Value: Yellow Ochre+Cadmium Orange
Refer to the Step-by-Step on page 87. Blend colors where they meet.
Accent: Apply the Mid Value of the Leaves
Tint: Cadmium Orange+Burnt Sienna. Use a small amount of this mixture.
The accent color as well as the tint should be applied on the edge of the painting. Using a dry-brushing, apply very light pressure using circular motion to blend into the background. Wipe your brush so the color does not go too far into the subject.
DECORATIVEPAINTERS.ORG
The Decorative Painter • SUMMER 2018 89
