
Page 85 - Hand rearing birds second
P. 85
68 Hand-Rearing Birds
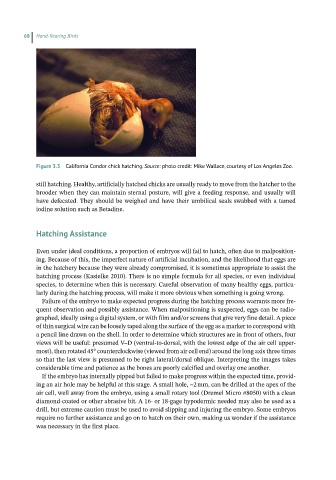
Figure3.3 California Condor chick hatching. Source: photo credit: Mike Wallace, courtesy of Los Angeles Zoo.
still hatching. Healthy, artificially hatched chicks are usually ready to move from the hatcher to the
brooder when they can maintain sternal posture, will give a feeding response, and usually will
have defecated. They should be weighed and have their umbilical seals swabbed with a tamed
iodine solution such as Betadine.
HatchingAssistance
Even under ideal conditions, a proportion of embryos will fail to hatch, often due to malposition-
ing. Because of this, the imperfect nature of artificial incubation, and the likelihood that eggs are
in the hatchery because they were already compromised, it is sometimes appropriate to assist the
hatching process (Kasielke 2010). There is no simple formula for all species, or even individual
species, to determine when this is necessary. Careful observation of many healthy eggs, particu-
larly during the hatching process, will make it more obvious when something is going wrong.
Failure of the embryo to make expected progress during the hatching process warrants more fre-
quent observation and possibly assistance. When malpositioning is suspected, eggs can be radio-
graphed, ideally using a digital system, or with film and/or screens that give very fine detail. A piece
of thin surgical wire can be loosely taped along the surface of the egg as a marker to correspond with
a pencil line drawn on the shell. In order to determine which structures are in front of others, four
views will be useful: presumed V–D (ventral‐to‐dorsal, with the lowest edge of the air cell upper-
most), then rotated 45° counterclockwise (viewed from air cell end) around the long axis three times
so that the last view is presumed to be right lateral/dorsal oblique. Interpreting the images takes
considerable time and patience as the bones are poorly calcified and overlay one another.
If the embryo has internally pipped but failed to make progress within the expected time, provid-
ing an air hole may be helpful at this stage. A small hole, ~2 mm, can be drilled at the apex of the
air cell, well away from the embryo, using a small rotary tool (Dremel Micro #8050) with a clean
diamond‐coated or other abrasive bit. A 16‐ or 18‐gage hypodermic needed may also be used as a
drill, but extreme caution must be used to avoid slipping and injuring the embryo. Some embryos
require no further assistance and go on to hatch on their own, making us wonder if the assistance
was necessary in the first place.