
Page 23 - The New Encyclopedia of Knots
P. 23
page 98) should be used.
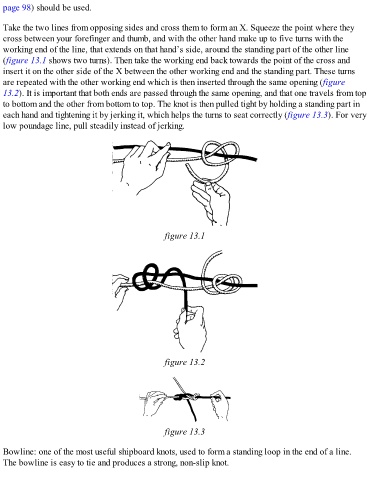
Take the two lines from opposing sides and cross them to form an X. Squeeze the point where they
cross between your forefinger and thumb, and with the other hand make up to five turns with the
working end of the line, that extends on that hand’s side, around the standing part of the other line
(figure 13.1 shows two turns). Then take the working end back towards the point of the cross and
insert it on the other side of the X between the other working end and the standing part. These turns
are repeated with the other working end which is then inserted through the same opening (figure
13.2). It is important that both ends are passed through the same opening, and that one travels from top
to bottom and the other from bottom to top. The knot is then pulled tight by holding a standing part in
each hand and tightening it by jerking it, which helps the turns to seat correctly (figure 13.3). For very
low poundage line, pull steadily instead of jerking.
figure 13.1
figure 13.2
figure 13.3
Bowline: one of the most useful shipboard knots, used to form a standing loop in the end of a line.
The bowline is easy to tie and produces a strong, non-slip knot.