
Page 112 - Casting of Angels- Dave Parvin
P. 112
108
surrounded the metal shim to contain Fourth, as you can see, I have
the liquid Forton MG has been removed rebuilt the clay dam that goes around
and will have to be reinstalled for the the outside of the mold. Just as for side
same purpose for side number two. one, the dam will contain the liquid
The next step is a small thing Forton MG as the layers are applied.
and optional but it makes taking the One of the really great properties
mold apart and assembling it more of Forton MG is that, unlike other
convenient. I’m going to imbed fender gypsum products, new material added
washers into the second side of the to old (set up) bonds beautifully. But,
mold which will help distribute the Photograph #17 since it is essential that the new side of
pressure of the tightened bolts to the the mother mold not stick to the first, a
Forton MG and also prevent the release is necessary. I applied the
washers from falling off whenever the naphtha nd petroleum jelly solution as
mold is disassembled. In photograph explained above. However, as added
#16, I am crimping or roughing up the insurance, I spread a little more
edges of a washer with a pair of side petroleum jelly on the Forton MG.
cutters so that the Forton MG will more In photograph #19, one of my
securely anchor it in place. In assistants is spreading on the second
photograph # 17, I have taken the bolts layer of Forton MG which, as will the
that will hold the two sides of the Photograph #18 third layer, contains shredded
mother mold and stood them vertically, fiberglass. The first layer was plain
heads down. With a drop of super glue, Forton MG to assure a smooth surface
I am attaching the washers to the bolts. on the inside of the mother mold. The
(Keep reading, this will make sense in a fourth and final layer also will be plain
minute.) for a smooth outside surface. If you
There are five things to note in look carefully, you can see that the
photograph #18. First, notice that two heads of the bolts have been surrounded
of the bolts and washers have been with small rings of clay. These rings
inserted into the threaded inserts. The make it easy to bury the washers
washers were screwed down only without locking in the bolts. Once the
within about 1/4 inch (1/2 cm) of the Photograph #19 Forton MG has set up, the clay can be
first side of the mother mold where they easily scraped out exposing the sides of
stay suspended in place because of the the bolt heads for easy fitting of a
glue. This will allow for the subsequent socket or nut driver. Also important is
Forton MG to go under the washers as that the two threaded metal inserts that
well as over their edges to anchor them were bolted to the wood base are being
in place and prevent them from falling completely covered.
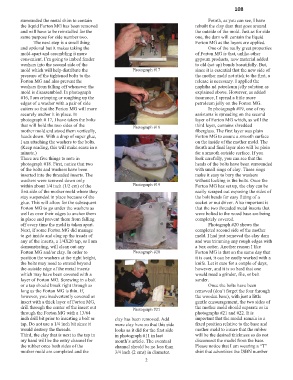
off every time the mold is taken apart. Photograph #20 shows the
Next, if some Forton MG did manage completed second side of the mother
to get inside and clog up the treads of mold. I had just removed the clay dam
any of the inserts, a 1/4X20 tap, as I am and was trimming any rough edges with
demonstrating, will clean out any a box cutter. Another reason I like
Forton MG and/or clay. In order to Photograph #20 Forton MG is that on the same day that
position the washers at the right height, it is cast, it can be easily worked with a
the bolts may need to extend beyond knife. Let it cure for a couple of days,
the outside edge of the metal inserts however, and it is so hard that one
which may have been covered with a would need a grinder, file, or belt
layer of Forton MG. Screwing in a bolt sander.
or a tap should break right through as Once the bolts have been
long as the Forton MG is thin. If, removed (don’t forget the four through
however, you inadvertently covered an the wooden base), with just a little
insert with a thick layer of Forton MG, gentle encouragement, the two sides of
drill through the center of the insert out Photograph #21 the mother mold should separate as in
through the Forton MG with a 13/64 photographs #21 and #22. It is
inch drill bit prior to inserting a bolt or clay has been removed. Add important that the model remain in a
tap. Do not use a 1/4 inch bit since it more clay here so that this side fixed position relative to the base and
would destroy the threads. looks as it did for the first side mother mold to insure that the rubber
Third, the clay that is next to the tap in in photograph #11 in last will be the desired thickness so do not
my hand will be the entry channel for month’s article. The eventual disconnect the model from the base.
the rubber once both sides of the channel should be no less than Please notice that I am wearing a “T”
mother mold are completed and the 3/4 inch (2 cms) in diameter. shirt that advertises the ISBN number
2