
Page 745 - Chief Architect Reference Manual
P. 745
Winders
3. Drag either of the handles on the first
tread outward from the stair section. If 7. Drag the edit handle on the second tread
the stair section is against a wall, only outward from the stair section to create a
one handle displays on the side opposite second starter tread.
the wall.
4. As you drag, the ends of the tread
become rounded.
8. To make changes to existing starter
treads, select the stairs, click the Starter
Tread edit button and repeat the
5. Two additional edit handles display on above steps as needed.
each side of the tread, along the back 9. When you are finished editing the starter
edge.
treads, click the Main Edit Mode t o
6. Drag either of the two square handles restore the stairs’ regular edit handles
upward to increase the width of the and toolbar buttons.
rounded ends of the tread.
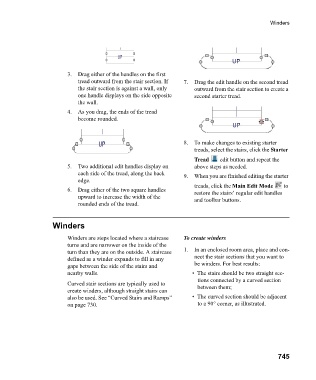
Winders
Winders are steps located where a staircase To create winders
turns and are narrower on the inside of the
turn than they are on the outside. A staircase 1. In an enclosed room area, place and con-
defined as a winder expands to fill in any nect the stair sections that you want to
gaps between the side of the stairs and be winders. For best results:
nearby walls. • The stairs should be two straight sec-
tions connected by a curved section
Curved stair sections are typically used to between them;
create winders, although straight stairs can
also be used. See “Curved Stairs and Ramps” • The curved section should be adjacent
on page 730. to a 90° corner, as illustrated.
745