
Page 3154 - Cote clinical veterinary advisor dogs and cats 4th
P. 3154
How to Administer Subcutaneous Fluids
VetBooks.ir BACKGROUND the right hand, and the port of the fluid bag is held in the left. The
spike will puncture a membrane in the port; when the bag is held
with the fluid line at the bottom, fluid will drip into the chamber.
When a dog or cat is dehydrated or at risk of dehydration, there
are several ways to maintain or recover normal hydration. These Now, hang the bag of fluids at a level higher than where your
methods include oral fluid administration (drinking or syringe-feeding), pet will be receiving them. For example, the bag can be hung by
intravenous fluid administration (fluids that flow through an IV into its loop (at the top of the bag) off the handle of a kitchen cabinet
the vein), or subcutaneous fluid administration. Subcutaneous fluids door. Or, you can slip the loop over a coat hanger that you then
are given with a needle and deposited under the skin (the skin is hang up on a coat rack (or anything else!). If you have a helper, the
the cutis, and subcutaneous means under the skin). When given helper can even hold the bag up high when it is time to start rather
in this way, fluids are absorbed slowly over several hours. This than hanging the bag. You will know the top from the bottom of
can be done in both cats and dogs and may be recommended the fluid bag because the print on the bag should be upright when
by your veterinarian as a form of treatment to be done at home. the bag is positioned properly. Remember that the higher the fluid
bag compared to the pet, the faster the flow.
GETTING STARTED With the open end of the tubing over a sink or bowl, remove the
In order to give subcutaneous fluids at home, you will need the cap and set it aside. Be sure to avoid touching the open end of
following supplies provided to you by your veterinary hospital: the tubing with your finger or anything else. Only the cap or a new
• Sterile needles needle should ever contact the tip; this preserves its sterility. Open
• A sterile fluid line all clamps on the fluid line, including a roller valve (small wheel in a
• A sterile bag of fluids rectangular plastic box) if one is present, and allow fluid to run out
• A receptacle for used needles. You can dispose of used needles the line. Be sure to allow the flow to continue for several seconds
in a thick plastic container with a lid, such as an empty laundry to remove the air, including large bubbles, throughout the length
detergent bottle, that can be taken to your veterinarian for of the tubing, then close one clamp to stop flow. A few small (rice
disposal. grain–size) bubbles are not a problem, but air that fills more than
• A way to keep the fluid bag high, either by hanging or having an an inch or two (few centimeters) of the tubing should be purged
assistant hold the bag. The higher the bag of fluids compared by reopening the clamp and allowing more fluid to flow.
to the pet, the faster the fluids will flow by gravity. Attach a covered needle to the fluid line on the opposite end from
• Something to distract your pet can be helpful. Canned cheese the chamber that is now stuck in the fluid bag. Examine the clear
works well for many pets. Once the fluid is flowing, a pea-sized plastic cylinder again, near the fluid bag. It should be approximately
dab of cheese that the pet can lick off your finger every few half filled with fluid and half with air. This way, you will be able to
minutes can make for a pleasant distraction. see dripping of fluid from the bag into the cylinder when the fluids
are being administered. If this cylinder is completely filled with fluid,
Setting Up turn it and the bag upside down and squeeze the cylinder, forcing
Your pet need not be present for the setup. First, wash your hands some fluid back into the bag and some air back into the cylinder.
before you assemble the fluid bag, fluid line, and needle. Fluid bags The system is now ready to deliver fluids. The process of assem-
come in a wrapper, so at first use of a bag you will need to remove bling the setup that you just performed only has to be done once
the wrapper. Next, identify the bottom of the bag, which usually has for each new bag of fluids, not with every treatment. Depending
two ports (short tubes) protruding from the end. One of these has on the size of the bag and the dose of fluids you will give, one bag
a removable cover, which is typically a plastic tab or sleeve that might last for several days.
can be peeled back and off the bag. You should do this, revealing
a tube that is the entry port for the fluid line connector. NOTE: the
inside of this tube (the entry port) is sterile, so be sure you only
touch the outside of it, and don’t reach inside it with anything.
Remove the fluid line from its wrapper. This is the coiled clear
plastic tubing. One or more flat plastic tabs—often blue or green—will
be entrapped in the tubing of the fluid line. These are sliding clamps,
and they have keyhole-shaped slits that allow you to close off the
flow in the tubing. You should slide one of these clamps (any one)
into the closed position now: a firm slide such that the tubing moves
from the wide to the narrow slot in the clamp’s keyhole, and the
tubing is pinched shut. The whole line of tubing is likely coiled and
secured by a paper tie that you can easily tear off. Both ends of the
tubing are capped; the end you are interested in is the large end,
with the clear plastic tubular chamber. Remove the cap from this
end, revealing a plastic spike-shaped tip. Do not touch it, as it is
sterile, and contact from your skin to the spike could allow bacteria
from your fingers to wind up in your pet’s tissues. Insert this spiked
end into the entry port of the fluid bag. Using a moderate amount
of pressure and a twisting back-and-forth motion, advance the
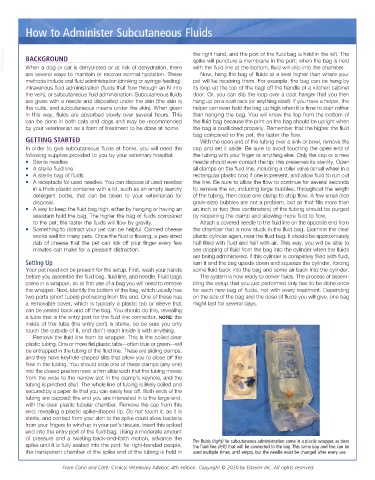
spike until it is fully seated into the port: for right-handed people, The fluids (right) for subcutaneous administration come in a plastic wrapper, as does
the fluid line (left) that will be connected to the bag. This same bag and line can be
the transparent chamber of the spike end of the tubing is held in used multiple times, until empty, but the needle must be changed after every use.
From Cohn and Côté: Clinical Veterinary Advisor, 4th edition. Copyright © 2020 by Elsevier Inc. All rights reserved.