
Page 131 - Casting of Angels- Dave Parvin
P. 131
127
outside, and over the front of the frame. After letting it cure
overnight, I turned over the rubber, removed the frame, and I
had my mold. By keeping the inside wall, i could fit the
mold around it and maintain its rectangular shape without
making a mother mold.
In Photo #2, I am dusting the inside of the mold with
metal powder. Photo #3 shows me pouring in polyurethane
resin. The resin attaches itself to the metal powder and the
result is a very credible fake metal frame. While any
urethane will probably work, my favorite with metal
powders id Easyflow Clear by PolyTec. Because it doesn’t
change color to white or gray as most urethanes do, a very
small amount of metal powder is needed. I initially tried
copper, brass, and bronze powders. While all three looked
just fine, I preferred the brass. Add some dyes and the
variations are endless. I also tried polyester resin but found
that it didn’t attach itself to the metal powders as well. An
acceptable finish can be achieved by painting, however.
While less expensive, the polyester takes longer to set up has
a much stronger odor which seems to stick around forever.
Photo 4
Photo 6
Photo 5
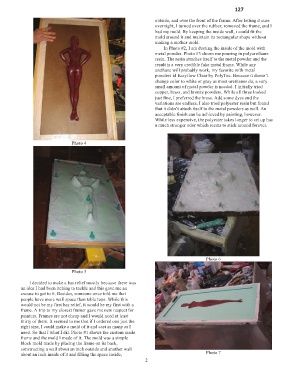
I decided to make a bas relief mostly because there was
an idea I had been itching to tackle and this gave me an
excuse to get to it. Besides, someone once told me that
people have more wall space than table tops. While this
would not be my first bas relief, it would be my first with a
frame. A trip to my closest framer gave me new respect for
painters. Frames are not cheap and I would need at least
thirty of them. It seemed to me that if I ordered one just the
right size, I could make a mold of it and cast as many as I
need. So that I what I did. Photo #1 shows the custom made
frame and the mold I made of it. The mold was a simple
block mold made by placing the frame on its back,
constructing a wall about an inch outside and another wall
about an inch inside of it and filling the space inside, Photo 7
2