
Page 151 - Casting of Angels- Dave Parvin
P. 151
147
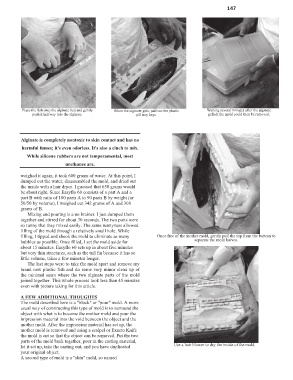
Place the fish onto the alginate bed and gently When the alginate gels, pull out the plastic Waiting several minutes after the alginate
push it halfway into the alginate. pill tray keys. gelled, the mold could then be removed.
Alginate is completely nontoxic to skin contact and has no
harmful fumes; it's even odorless. It's also a cinch to mix.
While silicone rubbers are not temperamental, most
urethanes are.
weighed it again; it took 600 grams of water. At this point, I
dumped out the water, disassembled the mold, and dried out
the inside with a hair dryer. I guessed that 650 grams would
be about right. Since Easyflo 60 consists of a part A and a
part B with ratio of 100 parts A to 90 parts B by weight (or
50/50 by volume), I weighed out 342 grams of A and 308
grams of B.
Mixing and pouring is a no brainer. I just dumped them
together and stirred for about 30 seconds. The two parts were
so runny that they mixed easily. The same runnyness allowed
filling of the mold through a relatively small hole. While
filling, I tipped and shook the mold to eliminate as many Once free of the mother mold, gently pull the top from the bottom to
bubbles as possible. Once filled, I set the mold aside for separate the mold halves.
about 15 minutes. Easyflo 60 sets up in about five minutes
but very thin structures, such as the tail fin because it has so
little volume, takes a few minutes longer.
The last steps were to take the mold apart and remove my
brand new plastic fish and do some very minor clean up of
the minimal seam where the two alginate parts of the mold
joined together. This whole process took less than 45 minutes
even with picture taking for this article.
A FEW ADDITIONAL THOUGHTS
The mold described here is a "block" or "pour" mold. A more
usual way of constructing this type of mold is to surround the
object with what is to become the mother mold and pour the
impression material into the void between the object and the
mother mold. After the impression material has set up, the
mother mold is removed and using a scalpel or Exacto Knife
the mold is cut so that the object can be removed. Put the two
parts of the mold back together, pour in the casting material,
let it set up, take the casting out, and you have duplicated Use a hair blower to dry the inside of the mold.
your original object.
A second type of mold is a "skin" mold, so named