
Page 79 - Corkjoint E-Catalogue
P. 79
INJECTION PROCESS
The following injection procedure is based upon the use of Hydrostop Acrylic Gel (HAG) injection material.
For an injection process using P.U, E.P or UFC, contact CORKJOINT for further information.
1. Prior to undertaking an injection process, check that the Hydrostop CJ1 is free and clear, by injecting
®
with water or air. Locations of the joint that have exposed voids or areas that have moisture or water
slowly leaking from them, use a quick dry cement to help plug the area so to help prevent the egress
of injection material out of the joint during the injection process.
2. Hydrostop CJ1 is injected via the Injection Point. The HAG injection material is injected into the
®
injection hose until 100% of the injection material is flowing out from the outlet pipe of the opposite
Injection Point. Once the HAG injection material is flowing freely (no air pockets or water from flushing
is present), stop injecting and close the outlet pipe off with the use of an injection nipple. The injection
hose is now ready for the 1st injection process to take place.
3. The injection process is undertaken with a suitable injection pump for use with HAG injection material.
A 2 component or 3 component manual or electric compressed air injection pump with an adjustable
pressure gauge manometer, provide the best optimal injection process. Hydrostop CJ1 is injected
®
with an injection pressure of approximately 2.0 Bar up to 3.0 Bar for Standard injection lengths. Low
pressure is best as it allows for the HAG injection material to slowly and easily penetrate into the joint,
cracks and voids of the concrete.
4. The injection process is monitored by visually inspecting the joint location where the injection hose is
positioned and by means of the pressure gauge on the injection pump. If a manual hand-pump is
being used, then monitoring is also done manually by feel and vision. Note: Not always are you able to
visually see injection material egressing out of the joint as the injection material may be coming out
from the opposite side of the joint that can’t be seen, so monitoring of the injection pump by the
pressure gauge, by feel and listening to the pump is important.
5. The injection process is continued until the joint is full with injection material. Depending upon the
type of injection pump being used, will depend upon how you are able to ascertain if the joint is filled
with injection material or if another injection process is required. If the joint stops leaking water after a
few minutes of injecting, then the injection process is successful and a second injection process may
not be required. A second injection process is recommended even if the joint stops leaking so to be sure
that the joint is completely filled with injection material.
6. Hydrostop CJ1 needs to be flushed out fully with water after the injection process has taken place and
®
prior to the HAG injection material curing, otherwise the injection hose will be blocked and no future
reinjection can take place.
Note: Installation Guidelines and Injection Method Processes are available upon request. Fully trained specialist
®
contractors are available to perform the installation and injection processes for Hydrostop CJ1. Refer to
CORKJOINT for further information.
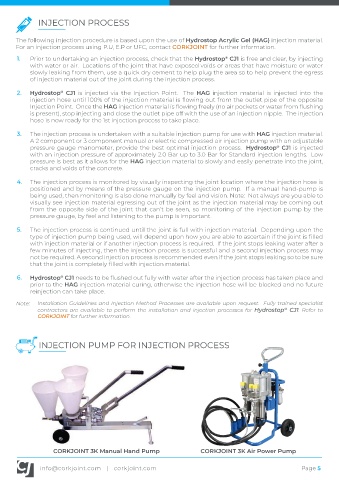
INJECTION PUMP FOR INJECTION PROCESS
CORKJOINT 3K Manual Hand Pump CORKJOINT 3K Air Power Pump
info@corkjoint.com | corkjoint.com Page 5