
Page 37 - CHAPTER 1
P. 37
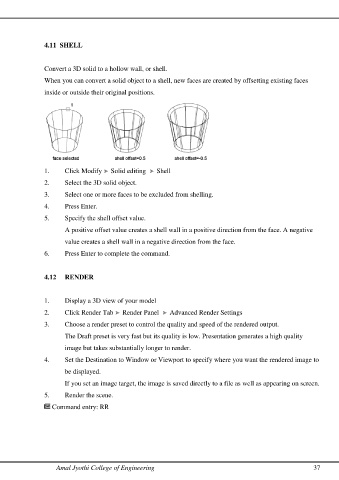
4.11  SHELL


                 Convert a 3D solid to a hollow wall, or shell.

                 When you can convert a solid object to a shell, new faces are created by offsetting existing faces
                 inside or outside their original positions.


                 1.     Click Modify   Solid editing    Shell
                 2.     Select the 3D solid object.

                 3.     Select one or more faces to be excluded from shelling.
                 4.     Press Enter.

                 5.     Specify the shell offset value.

                        A positive offset value creates a shell wall in a positive direction from the face. A negative
                        value creates a shell wall in a negative direction from the face.

                 6.     Press Enter to complete the command.


                 4.12  RENDER


                 1.     Display a 3D view of your model

                 2.     Click Render Tab   Render Panel    Advanced Render Settings
                 3.     Choose a render preset to control the quality and speed of the rendered output.

                        The Draft preset is very fast but its quality is low. Presentation generates a high quality
                        image but takes substantially longer to render.

                 4.     Set the Destination to Window or Viewport to specify where you want the rendered image to

                        be displayed.
                        If you set an image target, the image is saved directly to a file as well as appearing on screen.

                 5.     Render the scene.
                    Command entry: RR


                     Amal Jyothi College of Engineering                                                        37