
Page 86 - 2020 NuWood FlipBook
P. 86
P VC S H U T T E R
column installation
W R A P I N S T R U C T I O N S
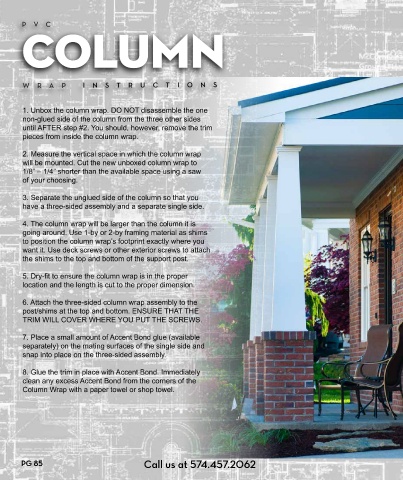
1. Unbox the column wrap. DO NOT disassemble the one
non-glued side of the column from the three other sides
until AFTER step #2. You should, however, remove the trim
pieces from inside the column wrap. CUSTOMER SERVICE
2. Measure the vertical space in which the column wrap
will be mounted. Cut the new unboxed column wrap to
1/8” – 1/4” shorter than the available space using a saw
of your choosing.
3. Separate the unglued side of the column so that you
have a three-sided assembly and a separate single side.
4. The column wrap will be larger than the column it is
going around. Use 1-by or 2-by framing material as shims
to position the column wrap’s footprint exactly where you
want it. Use deck screws or other exterior screws to attach
the shims to the top and bottom of the support post.
5. Dry-fit to ensure the column wrap is in the proper
location and the length is cut to the proper dimension.
6. Attach the three-sided column wrap assembly to the
post/shims at the top and bottom. ENSURE THAT THE
TRIM WILL COVER WHERE YOU PUT THE SCREWS. Non-corrosive countersunk fasteners should be placed in accordance with this diagram. The
circles represent countersunk screws or you can toe-screw at the x’s. Fasteners should be placed
7. Place a small amount of Accent Bond glue (available at the top and bottom, then evenly spaced over the length of the shutter as shown. All mechanical
separately) on the mating surfaces of the single side and fasteners are recommended to be screws and should be countersunk, filled with caulk or other fill
snap into place on the three-sided assembly. material, and touch-up painted.
8. Glue the trim in place with Accent Bond. Immediately
clean any excess Accent Bond from the corners of the
Column Wrap with a paper towel or shop towel.
THANK YOU FOR SPECIFYING
PG 85 Call us at 574.457.2062 SALES@NU-WOOD.COM PG 86
PG 85