
Page 239 - Photoshop for Lightroom Users – Scott Kelby 2nd Edition
P. 239
Tip: If It’s Not Right on the Money
When you choose Paste in Place, if it doesn’t place it right on the money (his head moved), I mentioned above you could use the Move tool to nudge it into
place. But, that’s not the tip. The tip is to go to the Layers panel and lower the Opacity of this pasted layer, so you can see his eyes from the Background
layer and that helps you line up his eyes on the two layers perfectly.
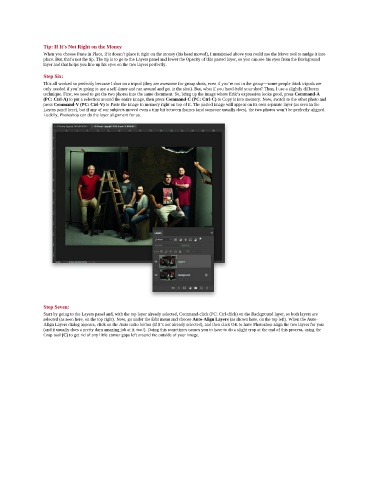
Step Six:
This all worked so perfectly because I shot on a tripod (they are awesome for group shots, even if you’re not in the group—some people think tripods are
only needed if you’re going to use a self-timer and run around and get in the shot). But, what if you hand-held your shot? Then, I use a slightly different
technique. First, we need to get the two photos into the same document. So, bring up the image where Erik’s expression looks good, press Command-A
(PC: Ctrl-A) to put a selection around the entire image, then press Command-C (PC: Ctrl-C) to Copy it into memory. Now, switch to the other photo and
press Command-V (PC: Ctrl-V) to Paste the image in memory right on top of it. The pasted image will appear on its own separate layer (as seen in the
Layers panel here), but if any of our subjects moved even a tiny bit between frames (and someone usually does), the two photos won’t be perfectly aligned.
Luckily, Photoshop can do the layer alignment for us.
Step Seven:
Start by going to the Layers panel and, with the top layer already selected, Command-click (PC: Ctrl-click) on the Background layer, so both layers are
selected (as seen here, on the top right). Now, go under the Edit menu and choose Auto-Align Layers (as shown here, on the top left). When the Auto-
Align Layers dialog appears, click on the Auto radio button (if it’s not already selected), and then click OK to have Photoshop align the two layers for you
(and it usually does a pretty darn amazing job at it, too!). Doing this sometimes causes you to have to do a slight crop at the end of this process, using the
Crop tool (C) to get rid of any little corner gaps left around the outside of your image.