
Page 65 - Photoshop for Lightroom Users – Scott Kelby 2nd Edition
P. 65
Step Four:
From the Color Space pop-up menu, you get to choose your file’s color space. Adobe recommends ProPhoto RGB for the best color fidelity, and if you
keep it at that, I’d go to Photoshop and change your Photoshop color space to ProPhoto RGB, as well—that way, both programs are using the same color
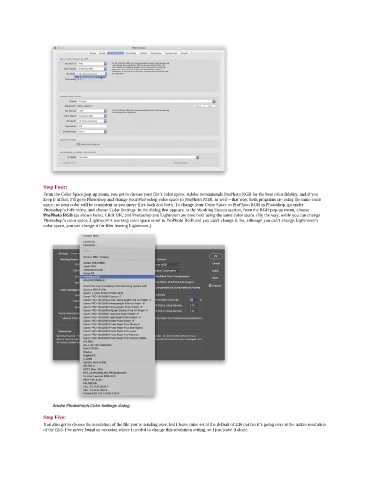
space, so your color will be consistent as you move files back and forth. To change your Color Space to ProPhoto RGB in Photoshop, go under
Photoshop’s Edit menu, and choose Color Settings. In the dialog that appears, in the Working Spaces section, from the RGB pop-up menu, choose
ProPhoto RGB (as shown here). Click OK, and Photoshop and Lightroom are now both using the same color space. (By the way, while you can change
Photoshop’s color space, Lightroom’s working color space is set to ProPhoto RGB and you can’t change it. So, although you can’t change Lightroom’s
color space, you can change it for files leaving Lightroom.)
Step Five:
You also get to choose the resolution of the file you’re sending over, but I leave mine set at the default of 240 ppi (so it’s going over at the native resolution
of the file). I’ve never found an occasion where I needed to change this resolution setting, so I just leave it alone.