
Page 65 - The Decorative Painter Summer 2015
P. 65
ACRYLIC
Using scissors, cut off the excess fabric. Turn the lid up- side down on a self-healing cutting mat or old cardboard, then use a craft knife to trim excess fabric as closely to the edge as you can. Using sandpaper or a cardboard nail file, clean the edges of the strings by pulling down, not up, with the sandpaper. If you accidentally loosen the fabric, add a little DecoArt Multi-Purpose Sealer to the wood and fabric to saturate the edges and let dry.
Use gray graphite to transfer the design onto the lid, making sure the wood connection on the lid is in the back. When transferring the plates, do not include the food. Ad- ditionally, do not transfer the knife, spoon, fork, and rib- bon when you transfer the napkin design.
Basecoat the large and small plate, but not the little glass dish, with Grey Sky. This will help block out the red checks on the fabric.
LET’S PAINT
WATERMELON PLATE
Please read the following instructions before beginning.
Using the no. 12 flat, paint the inside of the plate Snow White.
STEP 1: Wet the sea wool sponge with water, wring out excess water, and dip into Peony Pink. Pounce the color into the sponge. Dip the pounced sponge into a little wa- ter, and pounce onto a stack of paper towels. This will give a soft, watered look to your sponging. Apply the color to the plate by starting in the middle where the color is the deepest. Work in a circle and make the color come to the outer edges.
STEP2: AddsomeCountryRedintothespongeandwith the same loading procedure, sponge that onto the center. Because you will be working with so much water, you will have time to work this until you like it. A little extra water and a well-pounced sponge is the secret.
STEP 3: Basecoat the rim (rind) that is on the plate with Hauser Medium Green. When dry, stipple with Hauser Dark Green. Shade on the meat of the watermelon (next to the rind) with floated Sour Apple using the 5⁄8" angle shader. STEP 4: Add stripes of Hauser Light Green, then Mar- garita, to the rind using the 3⁄8" rake brush.
Shade the outer edge of the rind with floated Black Green. Make the seeds on the plate with Lamp Black, float Snow White on the fat end, and add a dot of the same to the float with your stylus. Transfer the food items onto the watermelon plate, omitting details that would be covered as you basecoat.
WATERMELON WEDGE
STEP 1: Apply Hauser Light Green to the rind, then stip- ple with Hauser Dark Green and Hauser Medium Green using a no. 2 or 4 liner.
STEP 2: Shade at the ends and the rounded area of the rind with floated Hauser Dark Green.
Apply a Snow White float next to the rind with the 5⁄8"angle shader.
STEP3: Whenthewhitefloatisdry,floatMargaritaover it. Apply float shading down both sides of the wedge with Country Red. Line both sides with thinned Antique Ma- roon using the no. 10/0 liner. Add the juice at the tip with a heavy wash of Country Red. Paint the seeds Lamp Black. STEP 4: Dry-brush a little Snow White on the wedge for a highlight, and float a little more on the juice and at the pointed tip. Highlight the wide ends of the seeds with floated Snow White. With the stylus, add a dot for a fur- ther highlight. Shade under the pointed tip with floated Antique Maroon.
DECORATIVEPAINTERS.ORG
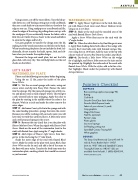
Painter’s Checklist
SUPPLIES
Basic painting supplies (see page 96) Batting
Craft knife
DecoArt DuraClear Satin Varnish DecoArt Multi-Purpose Sealer
Fabric of your choice (1⁄2 yard) Gray graphite
Magic Rub Eraser
Nail file (optional)
Painter’s tape
Plastic gloves
Sea wool sponge
Self-healing cutting mat Speedball Canary Tracing Roll White graphite
SOURCE
The Deep Oval Bentwood Carry-All with Fit- ted Lid, Picnic Basket Style + SHELF
(item no. WD1146) and Speedball Canary Tracing Roll (item no. HB341-123) are available from Hofcraft, 1 (800) 828-0359, www.hofcraft.com.
The Decorative Painter • ISSUE NO. 2, 2015 63
