
Page 68 - The Decorative Painter Summer 2015
P. 68
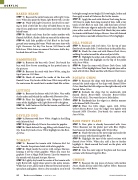
  ACRYLIC
 BAKED BEANS
STEP 1: Basecoat the entire beans area with Light Cinna- mon. When dry, paint the beans Light Buttermilk. Let dry. STEP 2: Wash with Light Cinnamon. Let dry. If it is start- ing to look a little like the color of baked beans to you, stop. If not, apply more washed layers until they look like baked beans.
STEP 3: Shade each bean that lies under another with floated Soft Black. Shade a little on some of the others too. STEP 4: Add little puddles of Soft Black to the back- ground areas among the beans. Wash one more time with Light Cinnamon. Let dry. Use the no. 10/0 liner to add little Snow White shines on some of the beans. Add a dry- brushed shine of Snow White.
HAMBURGER
STEP 1: Basecoat the bun with Camel. Dry-brush the bun with Raw Sienna according to the spotted areas in the pictures.
STEP 2: Basecoat the seeds with Snow White, using the tip of your no. 10/0 liner.
STEP 3: Shade all around the inside of the bun with floated Cocoa. Dry-brush a little Snow White very softly in the center area. Be careful not to make it look like a shine.
LETTUCE
STEP 1: Basecoat the lettuce with Irish Moss. Very softly shade under and behind the ruffles with Plantation Pine. STEP 2: Float the highlights with Margarita. Refloat some of the highlights with Light Buttermilk to brighten. STEP 3: Add Cadmium Red for the tomato, and Mustard Seed for the mustard.
DEVILED EGG
STEP 1: Basecoat with Snow White. Stipple in the filling with Mustard Seed.
STEP 2: Stipple Brandy Wine in the center for paprika. STEP 3: Shade behind the egg filling with floated Grey Sky, then dry-brush a Snow White highlight on the Bran- dy Wine.
TOMATO
STEP 1: Basecoat the tomato with Cadmium Red. Let dry. Transfer the pattern details with white graphite. STEP 2: Shade inside the curves with Antique Maroon, keeping it off the white graphite. When dry, erase the graphite (I use a Magic Rub Eraser). Line the tomato on the outside with thinned Antique Maroon.
STEP 3: Lightly dry-brush the center of the tomato with Light Buttermilk. Apply clean water to the entire tomato. While that is wet, add a wash of Mustard Seed and watch it spread out and lighten. Give it a few seconds to see if it will
66 The Decorative Painter • ISSUE NO. 2, 2015
be bright enough or too bright. If it’s too bright, let dry and then apply a wash of Cadmium Red to the tomato.
STEP 4: Apply the seeds with Mustard Seed using the no. 10/0 liner to make them long instead of dots. Add a tiny touch of Soft Black to each seed. Add thin lines of Snow White to the outer edges to make the seeds shine. Paint the juice with a wash of Cadmium Red. Shade the juice under the tomato with floated Antique Maroon. Line with thinned Antique Maroon and add a floated Snow White highlight.
DILL PICKLE
STEP 1: Basecoat with Irish Moss. Use the tip of your float brush to make little C-stroke dents in the pickle skin. STEP 2: Shade the stem end with Hauser Dark Green, walking the color toward the other end just a little.
STEP 3: Highlight the other end of the pickle with Mar- garita. Dry-brush the highlight on the top of the pickle with Snow White.
STEP 4: Paint the stems with Hauser Dark Green. Add tiny Snow White highlight lines. Paint the pickle juice with a wash of Irish Moss. Shade and line with Hauser Dark Green.
POTATO CHIPS
STEP 1: Basecoat the chips with Buttermilk. Shade all around the inside edges of the chips with floated Yellow Ochre, then float the little ridges on the right side only with floated Yellow Ochre.
STEP 2: Reshade the chips that lie underneath with floated Honey Brown+Milk Chocolate Brown+Yellow Ochre (tch:tch:1). You want this just a little darker.
STEP 3: Randomly line the edges in a sketchy manner with thinned Milk Chocolate.
STEP 4: Float the little ridges again with Yellow Ochre+Honey Brown. Line the ridges very lightly with thinned Milk Chocolate. Dry-brush the centers with Snow White.
BLUE FRUIT PLATE
STEP 1: Your plate is already basecoated with Snow White. Basecoat just the platter part with Blue Chiffon, then basecoat the braided edge with Winter Blue.
STEP 2: Shade the trim on the outer edge and under the raised sections with floated Sapphire Blue.
STEP 3: Highlight the tops of the raised sections with floated Snow White. When dry, add a line to further highlight it. Shade around the braid, on the plate, with floated Grey Sky.
STEP 4: Line the outer edge of the plate and the raised sections with thinned Sapphire Blue.
CHEESE
STEP 1: Basecoat the top piece of cheese with Golden Straw. Shade all four sides with Saffron Yellow. Basecoat the other piece with Butter.
DECORATIVEPAINTERS.ORG
