
Page 117 - The Decorative Painter Fall 2014
P. 117
ACRYLIC
Some strands are thick, and some are thin; some are straight, and others are bent. Refer
to the photo of the finished piece on page 109 for placement suggestions.
When the straw is
dry, use Soft Black to
shade around the or-
naments and borders
a second time. This
will allow the straw to
appear settled in its posi-
tion. Next, pull a few pieces
of straw over the shaded areas.
With Antique Teal and Leaf Green on the
no. 10/0 liner, add a few pine needles with Antique Teal, Leaf Green, and Bright Green here and there throughout the straw.
STRING
The string that runs through the entire design can be placed wherever you choose. Notice that it begins at the spool, runs through each grommet, and winds around each candy cane. Use the white Fons and Porter Mechani- cal Pencil to draw in the string. Follow that with Light But- termilk on a liner. Using the no. 10/0 liner with Tomato Red, add the slanted decorative lines.
FINISHING THE LID
Create the border around the outside of the lid by taping off the desired width of the border with painter’s tape. Dry-brush the entire outside border with a stencil brush with Heritage Brick followed by Tomato Red. Al- low this to dry completely, and then carefully remove the tape.
INSIDE OF BOX
The inside of the box can be decorated with any aspect of the lid’s design, following the directions previously given. Person- alize the box for gift giv- ing placing the recipient’s
name on a tag.
ANTIQUING
Allow the entire piece to dry at least forty-eight hours before antiquing. Place a small amount of Burnt Umber (oil) on a paper plate. Drop a bit of odorless paint thinner on the same plate. Wearing latex gloves (or another type, if you have a latex allergy), place a bit of the Burnt Umber (oil) on an old cloth, and dab it into the thinner. Rub over the entire box and lid. With a different cloth dipped only in the thinner, go over the entire piece again. Using a dry cloth, go over the entire thing once more. Repeat the antiquing method multiple times, until the desired effect is achieved. Take care not to leave fingerprints as you work. When you are satisfied with the piece, allow it to dry for at least one week
before varnishing.
FINISHING
This process can take several days, since each coat needs to dry before applying the next. The results are worth the wait. Sign your piece, and then varnish with at least five coats of J.W. etc. Right Step Clear Matte Varnish, following the manufacturer’s instructions. Apply the first coat with the brush of your choice, and the remaining coats with a Viva paper towel.
When the varnish is completely dry, apply J.W. etc. Painter’s Finishing Wax with steel wool. Buff with a soft cloth using a circular motion.
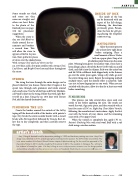
artist’s sketch
Amy J. Mogish devoted herself to decorative painting in 1990 and has been painting ever since. Amy’s first design was published in 2010, and designing has since become her passion. An SDP member since 2004, Amy is an active member of the Penn’s Woods Painters chapter in Mechanicsburg, Pa. Her work first appeared in The Decorative Painter in 2010, and she taught her first seminar in 2014. She residents in Tamaqua, Pa., with Jerry, her husband of twenty-five years. Visit Amy’s blog at www.classicamyjoanne.wordpress.com for design packets and workshop schedule. Like Amy at classic amy joanne on Facebook. Email Amy at classicamyjoanne@gmail.com.
dEcOratIvEpaINtErS.Org
The Decorative Painter • ISSUE NO. 3, 2014 115
