
Page 64 - The Decorative Painter Winter 2014
P. 64
acrylic
the brush, dry it thoroughly, and with a rotating motion integrate both colors. You might choose to use a mop to mix the colors. Because this is wet-on-wet, the surface can be dampened with an extender to facilitate the scumbling of the colors.
LET’S PAINT
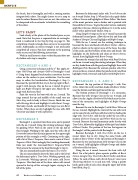
Look closely at the photo of the finished piece as you work. Note that the piece is separated into six rectangles. Each is numbered in the Step-by-Step on page 61. The completion of each rectangle does not occur in sequential order. Additionally, an entire rectangle is not necessarily completed all at once. Pay close attention to the painting order as you read the following instructions.
Work in small areas at a time so that the paint does not dry before each step is complete.
RECTANGLES 4 AND 6
Using a crisscross technique and the 1" flat, apply An- tique Gold Deep and Antique Gold to Rectangles 4 and 6. Using short, diagonal brushstrokes, intertwine the two colors on the surface to your satisfaction. Use the mini mop to soften the brushstrokes (Rectangle 6, Step 1). Basecoat the partial hill that sits in the top right of Rect- angle 6 with Georgia Clay on the no. 4 round. To give it light, use Bright Orange in the upper area. Shade the tri- angle with Rookwood Red.
Paint the vases in the boat with the no. 2 round. The rings around the top and middle of the small vase are Slate Grey, and its body is Burnt Sienna. Shade the vase with Heritage Brick and highlight it with Burnt Orange. The body, mouth, and handle of the large vase are Burnt Umber. When these are dry, highlight the vase with Milk Chocolate and shade it with Asphaltum.
RECTANGLE 5
Rectangle 5 is separated into three areas and is painted with the no. 6 round. Using the rotating technique, begin by applying White Wash in the center of the top half of this rectangle. Working to the right, mix this with a bit of Lemonade (notice that this mix appears on the upper-right portion of this rectangle as well). Continuing to the right, add a bit of Desert Turquoise. Now create a mix of Desert Tuquoise+White Wash and apply this (working downward) from just under the Lemonade/Desert Turquoise/White Wash area to the woman in the boat (Rectangle 5, Step 1).
The area immediately under the boat is True Ochre.
The area immediately above the boat and to the left of the fisherman’s pole is True Ochre. Working upward, mix in Lemonade. Working upward a bit more, add Desert Turquoise. This final mix of the three colors will extend upward to the top of this rectangle (again, staying to the left of the pole).
Basecoat the fisherman’s jacket with True Ochre on the no. 6 round (Jacket, Step 1). When this is dry, apply shades of Burnt Sienna and highlights of Moon Yellow. The sleeve of the man’s posterior arm is darker, and is painted with thinned Burnt Sienna. To give the jacket texture, randomly apply Burnt Sienna+Thickening Medium (1:1) to the entire jacket with a palette knife (Jacket, Step 2).
Using Tangelo Orange on the no. 6 round, basecoat the fisherman’s hat and pants. Allow this to dry, and then add shades of Georgia Clay and highlights of Bright Orange.
With the no. 2 round, use the rotating technique to basecoat the faces and hands with Burnt Umber. Add As- phaltum shades to the upper areas of the faces, the sides of the necks, and the bottoms of the arms and hands. The highlights on the foreheads and chins are Burnt Sienna. Accent these highlights with Burnt Orange.
Basecoat the woman’s hat and dress with Royal Fuchsia on the no. 4 round using the rotating technique. When they are dry, shade them with Burgandy and highlight them with Bubblegum Pink. Basecoat the woman’s poncho with Olive Green on the no. 4 round. Allow the poncho to dry, and then highlight it with Lemonade and shade it with Bright Green.
RECTANGLES 1, 2, AND 3
Basecoat the top portion of Rectangle 1 with True Ochre. Allow this to dry, and then shade with Burnt Umber near the bottom and Marigold toward the top.
The bottom portion of Rectangle 1 is a mountain. Basecoat this with Georgia Clay on the no. 6 round, and allow it to dry. Apply a Rookwood Red shade near the bot- tom of the mountain, and highlights of Bright Orange near the top.
Basecoat the sun (in Rectangle 2) with Moon Yellow on the no. 4 round. Highlight the center of the sun with Sand on the same brush, and then add obscurity by shading the edge with True Ochre. Add the sky under the sun with a rotation of Desert Turquoise and White Wash on the no. 6 round. Basecoat the small mountain under the sky with True Ochre, followed by highlights of Marigold and shades of Burnt Umber. The portion of the tree that appears in Rectangle 2 will be painted with Rectangle 3.
Basecoat Rectangle 3 with True Ochre on the no. 4 round. Allow this to dry. Using the same brush, add shades of Burnt Umber to the top portion of Rectangle 3. Basecoat the tree and mountain with Georgia Clay on the no. 6 round. Add highlights of Bright Orange and shades of Rookwood Red to those.
Using the no. 6 round, basecoat the boat with Soft Black. On a flat palette, place separate puddles of Burnt Sienna, Georgia Clay, True Ochre, Burnt Umber, and Moon Yellow. To each of these, add a bit of DecoArt Americana Thickening Medium (1:1) and mix well. Using a palette knife, apply a dab of each color along the upper half of the boat (Boat, Step 2).
62 The Decorative Painter • ISSUE NO. 4, 2014
decorativepainters.org
