
Page 1170 - Kitab3DsMax
P. 1170
Part XI: Advanced Lighting and Rendering
Using Other Render Effects
Now that I’ve covered the big brother of the render effects, let’s return to the Add Effect dialog box, where
six other render effects are available. If these selections aren’t enough, Max also enables you to add even
more options to this list via plug-ins.
Blur render effect
The Blur render effect displays three different blurring methods in the Blur Type panel: Uniform,
Directional, and Radial. You can find these options in the Blur Type tabbed panel in the Blur Parameters
rollout, shown in Figure 46.34.
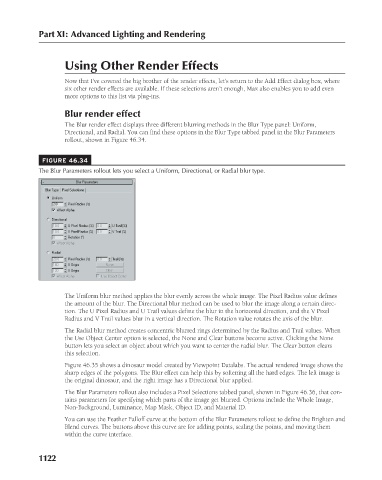
FIGURE 46.34
The Blur Parameters rollout lets you select a Uniform, Directional, or Radial blur type.
The Uniform blur method applies the blur evenly across the whole image. The Pixel Radius value defines
the amount of the blur. The Directional blur method can be used to blur the image along a certain direc-
tion. The U Pixel Radius and U Trail values define the blur in the horizontal direction, and the V Pixel
Radius and V Trail values blur in a vertical direction. The Rotation value rotates the axis of the blur.
The Radial blur method creates concentric blurred rings determined by the Radius and Trail values. When
the Use Object Center option is selected, the None and Clear buttons become active. Clicking the None
button lets you select an object about which you want to center the radial blur. The Clear button clears
this selection.
Figure 46.35 shows a dinosaur model created by Viewpoint Datalabs. The actual rendered image shows the
sharp edges of the polygons. The Blur effect can help this by softening all the hard edges. The left image is
the original dinosaur, and the right image has a Directional blur applied.
The Blur Parameters rollout also includes a Pixel Selections tabbed panel, shown in Figure 46.36, that con-
tains parameters for specifying which parts of the image get blurred. Options include the Whole Image,
Non-Background, Luminance, Map Mask, Object ID, and Material ID.
You can use the Feather Falloff curve at the bottom of the Blur Parameters rollout to define the Brighten and
Blend curves. The buttons above this curve are for adding points, scaling the points, and moving them
within the curve interface.
1122