
Page 299 - Kitab3DsMax
P. 299
Chapter 9: Grouping, Linking, and Parenting Objects
1. Open the T-28 Trojan plane.max file from the Chap 09 directory on the DVD. This file includes a
model created by Viewpoint Datalabs.
2. Click the Select by Name button on the main toolbar (or press the H key) to open the Select from
Scene dialog box. In this dialog box, notice all the different plane parts. Click the Select All but-
ton to select all the separate objects, and click OK to close the dialog box.
3. With all the objects selected, choose Group ➪ Group to open the Group dialog box. Give the
group the name Plane, and click OK.
4. Click the Select and Move button (or press W), and click and drag the plane.
The entire group now moves together.
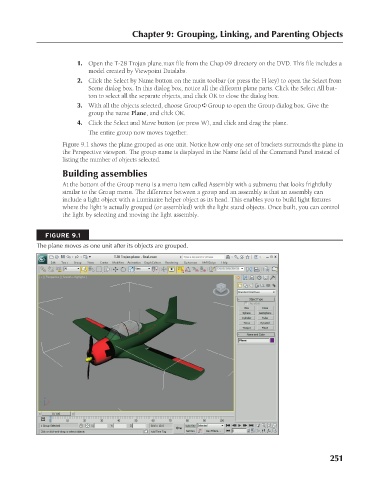
Figure 9.1 shows the plane grouped as one unit. Notice how only one set of brackets surrounds the plane in
the Perspective viewport. The group name is displayed in the Name field of the Command Panel instead of
listing the number of objects selected.
Building assemblies
At the bottom of the Group menu is a menu item called Assembly with a submenu that looks frightfully
similar to the Group menu. The difference between a group and an assembly is that an assembly can
include a light object with a Luminaire helper object as its head. This enables you to build light fixtures
where the light is actually grouped (or assembled) with the light stand objects. Once built, you can control
the light by selecting and moving the light assembly.
FIGURE 9.1
The plane moves as one unit after its objects are grouped.
251
6/30/10 4:19 PM
15_617779-ch09.indd 251
15_617779-ch09.indd 251 6/30/10 4:19 PM