
Page 99 - luminar 2018 - user manual pc v 2_3.pages
P. 99
Remember, a texture must be an external file. As you adjust the blend mode and opacity of the
texture layer, it will create many different creative effects. Each mode will have a different impact on
your image based on the type and opacity you choose. Adding a texture to your image can
dramatically change the look and feel of your work, plus you may want to use a brush to apply the
texture only in specific areas of your image.
__________________________________________________
Note
Textures are not stored in Luminar. These files are located wherever you’ve saved them for usage. For
easy access, we recommend keeping all of your textures in a consistent place on your hard disk.
__________________________________________________
Adding a Watermark or Logo
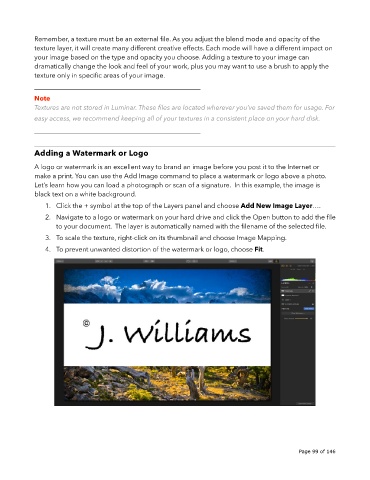
A logo or watermark is an excellent way to brand an image before you post it to the Internet or
make a print. You can use the Add Image command to place a watermark or logo above a photo.
Let’s learn how you can load a photograph or scan of a signature. In this example, the image is
black text on a white background.
1. Click the + symbol at the top of the Layers panel and choose Add New Image Layer….
2. Navigate to a logo or watermark on your hard drive and click the Open button to add the file
to your document. The layer is automatically named with the filename of the selected file.
3. To scale the texture, right-click on its thumbnail and choose Image Mapping.
4. To prevent unwanted distortion of the watermark or logo, choose Fit.
!
!
Page 99 of 146