
Page 25 - the art of mushrooms
P. 25
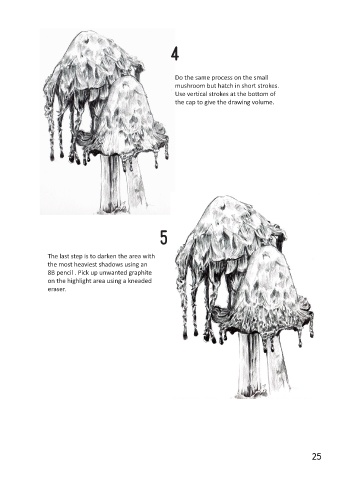
4


 1  Start with a pencil outline .                             Do the same process on the small


                                                              mushroom but hatch in short strokes.
                                                              Use vertical strokes at the bottom of
                                                              the cap to give the drawing volume.


 2


 With a 2B pencil,The first layer is
 simply light hatching to differrentiate the
 light parts and dark parts.
 Use the X pattern when shading.                         5


                  The last step is to darken the area with
                  the most heaviest shadows using an
                  8B pencil . Pick up unwanted graphite
                  on the highlight area using a kneaded
                  eraser.


 3


 Add darker shades under each fold on the
 mushroom cap to make the texture more
 prominent . so from the top of the fold is
 dark , the middle is light and darker at the
 drop. there is white tuffs on the strings
 therefore just shade in between it .
 As for the stem shade diagonally to
 show the direction of the light . Use the
 6B pencil for this step.


 24                                                                                                            25