
Page 16 - Laqfoil Technical Catalog
P. 16
The Installation Process
Next, we bring in the membrane. Back at headquarters, it has been cut to size (“size” being 7-10% smaller than the area to be covered). This may involve welding more than one piece together as the membrane comes in rolls, like fabric. We do the welding with a machine that has a 5000 + volt electrode, which uses high frequency electric waves to melt the plastic with pinpoint accuracy. The seams are always straight and flat. After the shape of the wall or ceiling to be covered has been created, we have fitted all of the edges with harpoon at our manufacturing facility. This is a specially shaped plastic strip which wraps around the edge of the material. It is stiffer than the membrane, yet still flexible. The harpoon is securely welded on to the membrane and can only be removed by cutting the membrane. On site, the membrane must be unpacked carefully so that it doesn’t come into contact with any dirt. Our installers wear gloves to prevent fingerprints.
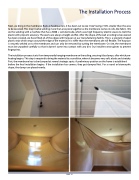
The installation process starts from temporarily hanging membrane on the ceiling, securing it by clumps, after which pre- heating begins. This step is required to bring the material to a condition, where it becomes very soft, elastic and stretchy. First, the membrane has to be clamped at several strategic spots. A preliminary position on the frame is established before the final installation begins. If the installation has corners, they get clamped first. For a round or biomorphic shape, the clamps are placed evenly.
PAGE 16
