
Page 37 - The Digital Cloth holiday issue
P. 37
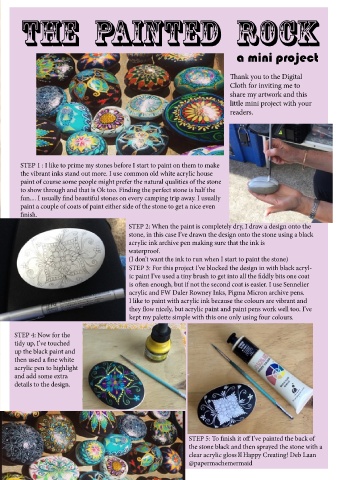
The Painted Rock


                                                                                  a mini project


                                                                                  Thank you to the Digital
                                                                                  Cloth for inviting me to
                                                                                  share my artwork and this
                                                                                  little mini project with your
                                                                                  readers.


        STEP 1 : I like to prime my stones before I start to paint on them to make
        the vibrant inks stand out more. I use common old white acrylic house
        paint of course some people might prefer the natural qualities of the stone
        to show through and that is Ok too. Finding the perfect stone is half the
        fun.... I usually find beautiful stones on every camping trip away. I usually
        paint a couple of coats of paint either side of the stone to get a nice even
        finish.

                                              STEP 2: When the paint is completely dry, I draw a design onto the
                                              stone, in this case I’ve drawn the design onto the stone using a black
                                              acrylic ink archive pen making sure that the ink is
                                              waterproof.
                                              (I don’t want the ink to run when I start to paint the stone)
                                              STEP 3: For this project I’ve blocked the design in with black acryl-
                                              ic paint I’ve used a tiny brush to get into all the fiddly bits one coat
                                              is often enough, but if not the second coat is easier. I use Sennelier
                                              acrylic and FW Daler Rowney Inks, Pigma Micron archive pens.
                                              I like to paint with acrylic ink because the colours are vibrant and
                                              they flow nicely, but acrylic paint and paint pens work well too. I’ve
                                              kept my palette simple with this one only using four colours.


      STEP 4: Now for the
      tidy up, I’ve touched
      up the black paint and
      then used a fine white
      acrylic pen to highlight
      and add some extra
      details to the design.


                                                                   STEP 5: To finish it off I’ve painted the back of
                                                                   the stone black and then sprayed the stone with a
                                                                   clear acrylic gloss     Happy Creating! Deb Laan
                                                                   @papermachemermaid