
Page 112 - Patty Hahne "The Pocket Guide to Prepper Knots"
P. 112
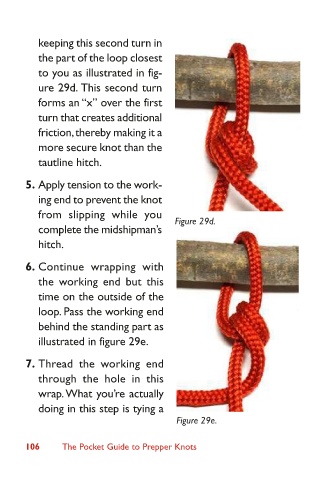
keeping this second turn in
              the part of the loop closest
              to you as illustrated in fig-
              ure 29d.  This second turn
              forms an “x” over the first
              turn that creates additional
              friction, thereby making it a
              more secure knot than the
              tautline hitch.

            5.  Apply tension to the work-
              ing end to prevent the knot
              from slipping while you
                                        Figure 29d.
              complete the midshipman’s
              hitch.
            6.  Continue wrapping with
              the working end but this
              time on the outside of the
              loop. Pass the working end
              behind the standing part as
              illustrated in figure 29e.

            7.  Thread the working end
              through the  hole  in  this
              wrap. What you’re actually
              doing in this step is tying a
                                        Figure 29e.

            106        The Pocket Guide to Prepper Knots