
Page 192 - 2107 N Rough Creek Builder Binder for Owner.pdf
P. 192
INSTALLATION
Step 9:
Make electrical
connec ons
WARNING! Working on an ener-
gized circuit can result in severe injury
or death from electrical shock.
NOTICE: Do not turn electrical power
NOTICE: The tank must be com- on unless you are sure all of the air is
pletely empty of air and full of out of the tank and the tank is com-
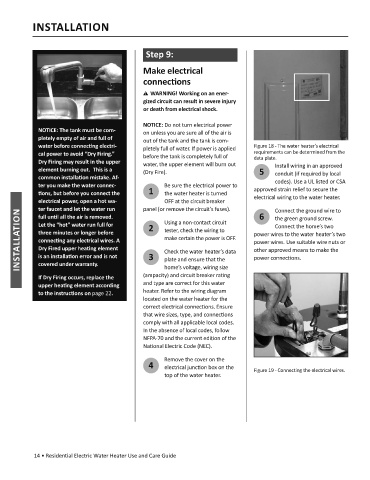
water before connec ng electri- pletely full of water. If power is applied Figure 18 -
before the tank is completely full of requirements can be determined from the
data plate.
Dry Firing may result in the upper water, the upper element will burn out
element burning out. This is a (Dry Fire). 5 Install wiring in an approved
common installa on mistake. Af- conduit (if required by local
ter you make the water connec- Be sure the electrical power to codes). Use a UL listed or CSA
ons, but before you connect the 1 the water heater is turned approved strain relief to secure the
electrical power, open a hot wa- OFF at the circuit breaker electrical wiring to the water heater.
ter faucet and let the water run Using a non-contact circuit 6 Connect the ground wire to
INSTALLATION three minutes or longer before 2 tester, check the wiring to power wires. Use suitable wire nuts or
full un l all the air is removed.
the green ground screw.
make certain the power is OFF.
connec ng any electrical wires. A
Dry Fired upper hea ng element
other approved means to make the
3
is an installa on error and is not
power connec ons.
plate and ensure that the
covered under warranty.
If Dry Firing occurs, replace the (ampacity) and circuit breaker ra ng
upper hea ng element according and type are correct for this water
to the instruc ons on page 22. heater. Refer to the wiring diagram
located on the water heater for the
correct electrical connec ons. Ensure
that wire sizes, type, and connec ons
comply with all applicable local codes.
In the absence of local codes, follow
NFPA-70 and the current edi on of the
Na onal Electric Code (NEC).
Remove the cover on the
4 electrical junc on box on the Figure 19 - Connecting the electrical wires.
top of the water heater.
al Electric Water Heater Use and Care Guide