
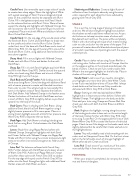
Page 79 - TheDecorativePainter_DP4_Winter_2018
P. 79
Candle Front: Use removable tape to tape sides of candle to create clean sharp edges. Warm the highlights of White with a good coverage of Sand. There are diagonal striped areas on the candle that need to be separated with Burnt Ochre. Fill in the lightest striped areas with Sand. Shade
on the sides and bottom with Burnt Ochre. Warm all areas except the shading and highlights with Yellowed Orange. You will now start to see more of the pores filling in but still not completed. Place in wick with White and shade on left with Burnt Ochre/Dark Brown.
Candle Stand: On the top edge of the candle stand soften the Sand with Burnt Ochre. Use Dark Brown to shade next to the candle and soften into the Burnt Ochre. Darken under front rim of the base with Dark Brown and a touch of Warm Grey 90%. On the legs of the stand fill in around the Sand with Burnt Ochre, using additional Sand to blend the two colors together.
Decoy Head: Fill in around lights with Yellowed Orange. Shade next with Burnt Ochre and darken further with Dark Brown.
Decoy Eye: Fill in iris with Sand. Highlight pupil with White and fill in with Warm Grey 90%. Darken around the eye and soften into head using Dark Brown and a touch of Warm Grey 90% right next to the eye.
Duck Body and Carved Feather: Add shading around all Sand areas using Burnt Ochre, blending with additional Sand with a heavier pressure to create well-blended transitions from color to color. This will also help to more solidly fill in pores in the lighter areas of Sand. Separate the feathers with Dark Brown. Add Yellowed Orange in the feather areas. Darken the bottom of the duck with Dark Brown and use
a touch of Warm Grey 90% to slightly darken as you blend upward into the body of the duck.
Book Covers: Place in shading with Dark Brown. Using additional Sand, blend the Dark Brown together using a slightly heavier pressure to fill in more pores. Place in a strong Cream highlight area with a little firmer pressure. Use Warm Grey 90% to separate the two books.
Book Pages: Add Dark Brown to shading, blending into Sand. Soften using Burnt Ochre between the Dark Brown and Sand.
Leaves: Shade first using Poppy Red and soften with Yellowed Orange. Strengthen highlights with both Sand
and Cream. Soften with Yellowed Orange into Poppy Red. Shade with Burnt Ochre using the circular strokes and a light pressure to soften into red and orange tones. Add touches of Orange.
Lotus Pod: The holes are softened with French Grey
50%. Further darken with Dark Brown and a lesser amount of Warm Grey 90%. Add tints of Poppy Red and Orange and soften these colors with French Grey 50% to subdue. For the top edge of the pod use the French Grey 50% to soften into the Sand. Strengthen lights with additional Sand. Darken areas with Dark Brown as shown.
Shadowing and Reflections: Create a slight illusion of reflections from the objects above by using the same colors required for each object but more subdued by graying with French Grey 50%.
STAGE 3
This is our fine-turning stage of placing in the details and tints. We will also strengthen highlights and darken the shadows as well as add some reflective tints. As you do this be sure to keep transition areas of colors well- blended without hard lines. The pores will be completely filled in with a burnishing technique which means binding color to color, and color into the pores of the paper. This process will create a beautiful blended colored pencil piece of art which resembles an oil painting but with the ease of colored pencils.
Candle: Place in darker values using Tuscan Red for a rich tinting color. Soften with touches of Orange. Use this on the edges as well as on the striped areas between the bands of colors. Check to see if you need to add a little White in the strongest highlights on the left side. Place in shadow of the wick using Dark Brown.
Candle Stand: Look to see if you need to strengthen your highlights one more time with a little White. Check to see if you need additional tints of Tuscan Red. I always check darks one final time to see if they need to be darkened with Warm Grey 90% or Dark Brown.
Decoy: Starting on the head add additional White highlights but in lesser amount than before. Soften with Yellowed Orange. The highlights on the body are duller. Next add your tints using Orange and Tuscan Red. Also check your darks with both the Dark Brown and Warm Grey 90%.
Book: Brighten the highlight running along the center
of the binding and notice it does not run the entire length of the book. Darken further with Warm Grey 90%. Add tints using Tuscan Red. On the pages add thin lines of Dark Brown/Warm Grey 90% to create the illusion of individual pages. Check to see if the design on the books needs to be slightly darkened but be careful that it looks washed out in the highlighted area.
Leaves: They will probably need a little tweaking with tint colors such as Orange and Tuscan Red. On the front closer leaf on the far left add a touch of stronger highlight of White softened with Cream and Sand.
Lotus Pod: Check to see if you need any of the colors more solidly filled in from the previous instructions.
FINISHING
When your project is completed, do not spray but simply mat and frame under glass.
DECORATIVEPAINTERS.ORG 77
