
Page 23 - DPM3_FallandWinter_2022
P. 23
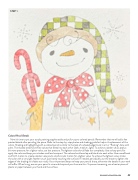
 STEP 1
Colored Pencil Details
Now it’s time to put your acrylic painting supplies aside and pull out your colored pencils. Remember that we will add a few painted details after penciling the piece. Refer to the step-by-step photos and shading guide for help in the placement of the colors. Shading and highlighting with a colored pencil is similar to the look of a shaded edge found in art or “floating” done with paint. The shaded areas have three values that bleed into each other (dark, medium, light). To achieve a darker value, apply a
bit more pressure; for a lighter value, use less pressure. The lightest value should fade out completely. Use a sharp pencil to apply the color and keep your strokes small and compact. The values should overlap and blend into each other. Use a small back and forth motion to create a darker value and a small circular motion for a lighter value. To achieve the lightest value, stroke
the color with a very light feather touch (just barely touching the surface). If needed, periodically use the eraser to lighten the edges of the shading so it fades out nicely. It’s so important always to keep your pencils sharp, otherwise the details in your work will suffer. When lining, ensure your pencil is nice and sharp and your lines are thin. To prevent smearing, use a barrier piece of plastic or paper between your hand and the surface.
DECORATIVEPAINTERS.ORG 21
