
Page 102 - Smart Photography
P. 102
LEARNING
Portrait Retouching
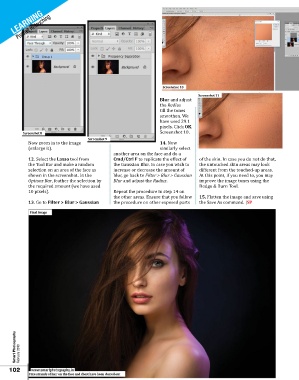
Screenshot 10
Screenshot 11
Blur and adjust
the Radius
till the tones
smoothen. We
have used 29.1
pixels. Click OK.
Screenshot 8 Screenshot 10.
Screenshot 9
Now zoom in to the image 14. Now
(enlarge it). similarly select
another area on the face and do a
12. Select the Lasso tool from Cmd/Ctrl F to replicate the effect of of the skin. In case you do not do that,
the Tool Bar and make a random the Gaussian Blur. In case you wish to the untouched skin areas may look
selection on an area of the face as increase or decrease the amount of different from the touched-up areas.
shown in the screenshot. In the blur, go back to Filter > Blur > Gaussian At this point, if you need to, you may
Options Bar, feather the selection by Blur and adjust the Radius. improve the image tones using the
the required amount (we have used Dodge & Burn Tool.
10 pixels). Repeat the procedure in step 14 on
the other areas. Ensure that you follow 15. Flatten the image and save using
13. Go to Filter > Blur > Gaussian the procedure on other exposed parts the Save As command. |SP
Final Image
Smart Photography February 2018
102 www.smartphotography.in
Fine strands of hair on the face and chest have been cloned out